Recipe – Sweet Red Peppers with a Chipotle Kick!

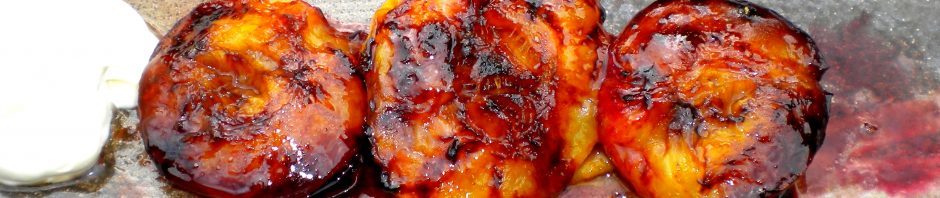
Your barbecued burgers, ribs and spicy sausage will thank you for this.

Its perfect served with meats straight off the grill; the peppers are cooked until meltingly soft and with the addition of smoked chili, roasted cumin, garlic and tomato paste you’ll end up with a robust and spicy side dish.

It’s so good that I’ll eat it without meat, so vegetarians take heart!

You don’t have to use red peppers; try yellow, orange or a combination of all three – red peppers just look brighter. Avoid the green ones as they’re under-ripe yellow peppers and aren’t good for this recipe.

If you can’t get hold of chipotle powder or dried flakes, use a mild chili powder. It won’t kick you quite as hard but is delicious nonetheless!

Note at the end:

SWEET RED PEPPERS with a CHIPOTLE KICK (Adapted from a Delia Smith recipe)

(Serves 6-eight)

Ingredients:

2 lbs / 900g of red peppers (or any combo of red, orange and yellow)

3 tablespoons of extra-v olive oil

2 rounded teaspoons of cumin seeds

2 teaspoons of chipotle powder or mild chili powder; increased or decreased according to taste

10 cloves of garlic, finely chopped

5 tablespoons of tomato paste/puree

Sea salt

Action:

Dry roast the cumin seeds in a skillet on the stove top until slightly darker and fragrant – set aside.

Wash and dry the peppers; remove the stalks, seeds and any excess of white membrane and cut into ¼ inch / 5mm strips

Heat the oil in a large skillet over medium heat and add the toasted cumin first. Toss around for a minute then add the garlic and chipotle/chili powder. Stir to combine everything then add the sliced pepper strips.

Give it a good stir to make sure everything is well blended. Reduce the heat to low and cover. Allow to cook until the peppers are very soft… 35-45 minutes.

Uncover; stir in the tomato paste and continue to cook uncovered for another 15 minutes or so – if there’s a lot of liquid, turn the heat up to reduce it. Taste and adjust the amount of tomato paste if you think it needs it.

Give it a good sprinkle of sea salt – stir, taste and add more as needed.

Serve warm or at room temperature. It keeps well in the fridge for a few days but bring it back to room temp before serving.

Notes:

Chipotle is a smoked dried jalapeno chili pepper and comes in cans in adobo sauce, whole dried, powdered, or crumbled flakes.

I’ll be traveling for a couple of weeks and plan to take a vacation from my computer as well. I’ll no doubt return with some gastronomical delights to share, so until then……Happy July 4th and Bon Appétit!

Posted in Vegan, Vegetables / Vegetarian | 1 Comment

Recipe: Watermelon, Mint & Onion

There’s nothing simpler, nothing more refreshing and it’s perfect for summer.

My sister gave me this recipe (if you could call it a recipe, with only 3 ingredients) about thirty years ago.

The first time I served it over here was in the Deep South where it was greeted with confused amazement; one person had assumed it was a tomato salad until they took a mouthful. I’d always thought of the US as the land of the watermelon amongst other things, so I was expecting to come across numerous ways of serving it but I haven’t so far. Anyway… it’s wonderful and everyone loves this.

I like to serve it as a relish to accompany Indian cuisine and it goes with anything BBQ-y as a side dish. Or eaten on its own straight from the fridge on a hot day…

Despite its simplicity, there’s a note at the end –specifically aimed at Margarita-lovers.

Watermelon, Mint & Onion Salad

Watermelon, Mint & Onion Salad

WATERMELON, ONION & MINT SALAD

Ingredients:

(Serves 2-4)

Half of a small round seedless watermelon

1/3 cup of finely chopped Vidalia onion (or whatever mild onion you can find)

1/3 cup of shredded fresh mint leaves

Action:

Cut the watermelon in half and trim a slice off the base to make it stable.

Scoop out all of the flesh and combine it with the chopped onion and shredded mint. (Aka ‘chiffonade’, made the same way as in previous recipes for kale salad; tomatoes with basil, etc).

Pile everything back into the melon shell; cover and chill for 20 mins – 2 hours.

That’s it.

Notes:

Want to make a lot? Just up the quantities to taste.

Cut watermelon into 1 inch chunks and freeze. When you make blended margaritas, use frozen watermelon instead of ice – really yummy and so pretty!

Posted in Salads & Appetizers, Vegan | 3 Comments

Recipes: Tomatoes + Basil = Summer!

If you could capture the flavors of summer on a scale of 1-10, this would be an eleven.

Roasting ripe tomatoes in the oven with basil and garlic not only intensifies the flavors, it also creates wonderful juices that are perfect for mopping up with warm crusty bread.

Or, if you’re pressed for time and want a perfect fresh tomato and basil salad, there’s nothing nicer (or easier) than the PRESSED TOMATO & BASIL SALAD that our mother used to make.

English home-grown tomatoes are unbeatable in my opinion, so there. Sadly, we didn’t grow our own tomatoes when I was growing up – but the local tomatoes we bought from the horse-drawn fruit and vegetable cart that toured our neighborhood were just as good; as were the ones that the man next door cultivated in his greenhouse.

He was a very kind man who never mentioned the fact that one or two had been plucked from his vine; probably by a naughty 7yr old who’d climbed over the adjoining garden wall to steal a big ripe tomato, warm from the sun.

So here are two recipes; both glorifying ripe tomatoes and basil and I love them equally:

Roast Tomato Salad with Olives & Basil

Roast Tomato Salad with Olives & Basil

ROASTED TOMATO SALAD with BASIL, GARLIC & BLACK OLIVES (a Delia Smith recipe)

(Serves 4-6 as an appetizer)

Ingredients:

12 large ripe tomatoes

12 large fresh basil leaves, torn in half

2 fat cloves of garlic, finely chopped

2 tablespoons of extra-v olive oil

Sea salt and freshly milled black pepper

To finish:

12 more large basil leaves, torn in half

2 dozen small pitted black olives (such as kalamata), rinsed and drained

2 more tablespoons of extra-v olive oil, whisked together with…

2 tablespoons of good balsamic vinegar

Action:

Pre-heat the oven to 400F / 200C

You need to skin the tomatoes so cut a tiny X at the top of each, place in a large heatproof bowl and pour boiling water over them to cover. Leave for 1 minute then drain.

When they’ve cooled, slip the skins off and cut them in half around the equator. Place them cut side up in a shallow roasting tin and season with salt and pepper.

Scatter the chopped garlic over the tomatoes followed by a drizzle of olive oil.

Top each tomato with half a basil leaf, making sure the basil gets covered with oil.

Put in the top part of the oven and roast for approx 1 hour or until the edges are starting to blacken. Remove from the oven and cool to room temp. This can be done a few hours ahead.

Just before serving, decorate each tomato with another half basil leaf, a black olive and finish with a good drizzle of balsamic and olive oil dressing.

Serve at room temp with warm crusty bread.

And now for the uncooked but equally delicious version:

Pressed Tomato & Basil Salad

Pressed Tomato & Basil Salad

PRESSED FRESH TOMATO & BASIL SALAD

(Serves 4-6)

Ingredients:

12 large very ripe tomatoes

12 large basil leaves

Sea salt

Extra-v olive oil

Balsamic vinegar; the older the better (25 yrs old would be perfection)

Freshly milled black pepper

Action:

Slice the tomatoes ½ inch thick, thinly cutting off and discarding the stalk end. Place the slices close together in one layer on a large plate. Give them a good grind of sea salt.

Stack the basil leaves together, roll them up tightly and slice across very thinly to create fine shreds, aka ‘chiffonade’.

Scatter the shredded basil all over the tomatoes then give everything a good drizzle of olive oil.

Lay a piece of foil on the tomatoes, tucking in snugly around the plate. Find a good book (fiction or non-fiction, doesn’t really matter) that fits on top of the foil-covered tomatoes – now find something heavy to set on top of the book…. something weighing 2-3lbs should do the trick.

Let it press for 1 hr at room temp.

Remove the book, foil and 3 lb bag of dog biscuits or whatever. Transfer the now incredibly basil-y and slightly bruised tomatoes to a serving dish and pour all the fabulous juices over them.

Finish with a good drizzle of balsamic vinegar and a grind of black pepper; serve at room temp with warm crusty bread.

Any leftovers can be stored in the fridge but bring it to room temp before eating, or pulverize them in a processor and tossed with freshly cooked spaghetti or your favorite pasta to make a lovely pasta salad.


Posted in Salads & Appetizers, Vegan | 4 Comments

Recipe: Very Easy Apricot Tart with Almonds

I bought a large quantity of the plumpest, nicest-looking apricots in Costco the other day and realizing I couldn’t eat them fast enough before they became overripe, I decided to make an open tart after finding some puff pastry lurking in the back of my freezer.

It was a toss-up between apricots or the very ripe pears I bought at the same time; the apricots won because the pears were a bit too ripe and the apricots were so sunshiny-looking and anyway, apricots create an incredibly luscious and slightly tangy tart, which I love.

The addition of flaked almonds and a sprinkle of Amaretto didn’t hurt either – the whole thing only took a few minutes to prep so you can whip this up and bake it in 35 mins flat, provided that you too have some ready-made puff pastry lurking somewhere in your freezer.

Affogato al caffe 024On a completely different topic but every bit as sweet, here’s a pic of our tiny visitors from last summer.

As for the tart; serve it warm or at room temp with a good dollop of lightly sweetened whipped cream, creme fraiche or vanilla ice cream.

There are notes at the end re alternative fillings.

Blog, June Apricot Tart

EASY APRICOT TART with ALMONDS

(Serves 4-6)

Ingredients:

One sheet, or 8 oz / 230g of frozen puff pastry, defrosted at room temp for 40 minutes

6 big, fat, almost-ripe apricots (or more if they’re small), rinsed and patted dry

¼ cup of flaked almonds

1 tablespoon of Amaretto liqueur

3 tablespoons of fine white sugar

Egg white, lightly beaten

Action:

very Easy Fig Tart

very Easy Fig Tart

Pre-heat oven to 400F / 204C

Line a baking sheet with baking parchment.

Roll out the puff pastry on a lightly floured board until you have a rectangle approx 10 in x 12 in (or 25cm x 30cm).

Carefully transfer the pastry to the baking sheet and brush around the edges with a little egg white and then fold them in 1 inch / 2.5cm to raise the edge. This will puff up and prevent the filling from leaking.

Slice the apricots into 6 wedges each and pack them into the center of the pastry with the skin down and the cut edges uppermost.

Brush the pastry edges once more with beaten egg white.

Scatter the flaked almonds over the apricots then sprinkle over the Amaretto.

Sprinkle the sugar over everything, including the pastry edges.

Bake in the center of the pre-heated oven for 30 minutes or until the pastry is puffed and golden and the fruit has started to brown at the edges.

Cool on a rack until its just warm or room temp – best eaten right away.

Notes:

This would work really well with other stone fruits such as peaches, nectarines or plums and I plan to try it with fresh figs, honey and thyme once purple figs are available up here in the mountains, so stay tuned for a fabulous fresh fig version over the coming weeks!

Posted in Desserts, Vegan | 5 Comments

Recipe – Incredible Kale Salad

To the uninitiated, a salad made with kale might sound about as appetizing as a cod liver oil and vinegar dressing; healthy but unpleasant.

However, kale salad is unusually delicious and tastes even better the following day and into the next – it’s become my favorite salad and it transitions really well from winter into summer.

I ate some the other night in a restaurant and decided that I could improve upon it. You can play around with different ingredients and make your own version; here’s mine…followed by a recipe for KALE CRISPS; a great way to get kids (including significant others) to eat their greens and they’re a wonderful healthy snack that won’t stick around for long one you’ve offered them up.

Notes at the end.

KALE SALAD

Ingredients:

1 bunch of kale; stalk and any tough ribs cut out and discarded

1 teaspoon of sea salt

1/3 cup of lightly toasted pine nuts (toast in a dry skillet and watch like a hawk or they’ll burn in a nanosecond)

¼ cup of finely diced red onion

1/3 cup of golden raisins, chopped

¾ cup of finely chopped unpeeled apple

¼ cup of extra virgin olive oil

2 tablespoons of lemon juice

½ tablespoon of clear honey

1/3 cup of grated Parmigiano-Reggiano

Action:

After trimming the tough parts away, wash and thoroughly dry the kale; stack it and roll up tightly then slice across very thinly to create fine shreds (aka ‘chiffonade’) – put the shredded kale in a large bowl with the sea salt.

With your fingers, massage the kale and salt together for a full 2 minutes.

Transfer kale to a serving bowl leaving any liquid behind.

Whisk together the olive oil, lemon juice and honey and add this to the kale along with everything else except the cheese… give it a good toss around.

Let it sit at room temp for 20 mins then adjust the lemon juice, olive oil and honey to taste; finally add the cheese.

Give it all a good final toss – chill for 1 hour to 2 days (covered) and serve.

Notes:

Experiment with different ingredients such as dried currants or cranberries instead of golden raisins; ripe pear instead of apple; diced Gorgonzola instead of Parmigiano-Reggiano and chopped caramelized walnuts instead of toasted pine nuts – crumbled feta cheese and chopped black olives makes more of a Greek kale salad.

Now for the more-ish snack…..

You wouldn’t think its possible to want to scarf down a whole bunch of kale in a few minutes but when you bake kale in the oven with olive oil and sea salt, you get a light-as-air, green, crispy treat that’s an addictive and healthy alternative to potato or corn chips:

OVEN BAKED KALE CRISPS

Ingredients:

1 bunch of kale, tough stem and ribs removed and leaves torn into bite sized pieces

1 tablespoon of extra virgin olive oil

1 teaspoon of sea salt

Action:

Pre-heat oven to 350F / 180C

Line a cookie sheet or shallow roasting pan with baking parchment

Wash and thoroughly dry the torn kale leaves

Toss with the olive oil and make sure every piece is coated with oil, then add the sea salt and toss again.

Spread on the baking sheet and bake for 10 mins or until the edges have turned a light brown. Remove from the oven and serve.

As they’re feathery-light, any slight breeze will send them flying all over the place so serve them away from drafts…half of mine blew away when I took the picture!

Posted in Salads & Appetizers | 7 Comments

Recipe: My favorite Beefburger with Mustard & Dill

Yesterday I was thinking that summer isn’t remotely here in the Rockies and I had to grill indoors. Even the hummingbirds seemed a bit underwhelmed by the weather but today it’s another matter and we’re all in raptures, not least because we’re still here to enjoy the sunshine!

Anyway, this burger is delicious made with ground buffalo, bison, beef or turkey.

You’ll need to buy very lean ground meat for this. The mustard-sour-cream-dill sauce doesn’t in any way overwhelm the flavor – it just creates a wonderfully juicy and tasty burger.

Serve it on your favorite toasted burger bun – in my case this means one half of the smallest bun available and I like a wheat and gluten free variety that I find in the frozen bread section of the supermarket; made by ‘Kinnikinnick Foods’. It’s so light and barely does the job of holding the burger in place….a good excuse for finger-licking.

Notes at the end.

Beefburger with Mustard & Dill

Beefburger with Mustard & Dill

MUSTARD DILL BURGERS

(Serves 2)

Ingredients:

10 oz lean ground beef, buffalo, bison or turkey

3 tablespoons of sour cream (not low fat)

3 tablespoons of Dijon mustard

1 ½ tablespoons of fresh dill, chopped

Sea salt, freshly milled black pepper

Burger buns

Action:

Combine together the sour cream, mustard and dill.

Add 3 tablespoons of this to the ground meat; blend thoroughly and lightly season with salt and pepper. Set aside the rest of the mustard-sour-cream-dill mixture.

Form two burger patties approx ½ inch thick and grill both sides for approx 4 mins.

Toast the buns and spread the remaining sour-cream-mustard-dill onto each bun; load with sliced tomato, lettuce and burger then eat ASAP.

Notes:

You could try making salmon burgers this way and because it could be a bit fatty, I’d reduce the amount of sauce that’s added to the minced fish and serve more on the side – the flavors will certainly go very well together.

I prefer arugula (aka rocket) to lettuce.

You probably won’t need all of the sour cream mixture so any left over will go well with grilled salmon; a smoky sausage; smoked whitefish; kipper, etc.

You can mix everything together and kept it covered in the fridge for a day before forming the burger patties – it’s really good!

Posted in Meat | 6 Comments

Recipe: Summer Berries with a Balsamic Caramel Syrup

I was going to wait until the July 4th weekend to post this unbelievably easy recipe (because of the red, white and blue) but it feels so summery today and I’ll be traveling in the UK on the Fourth of July this year.

We Brits don’t celebrate Independence Day although I think we should as according to the history taught in our schools, America had became a rather troublesome colony – not only that, I believe Betsy Ross was inspired by our Union Jack’s colors….

This is so simple I feel almost embarrassed; I keep a screw top jar of this wonderful balsamic caramel syrup in my kitchen cupboard and it’s all you need to create an instant, summery, sophisticated, color-coordinated dessert, along with ripe strawberries and blueberries and the very best vanilla ice cream you can buy.

Notes at the end.

Blog, Berries with balsamic caramelSUMMER BERRIES with VANILLA ICE CREAM & BALSAMIC CARAMEL SYRUP

Ingredients:

(Makes approx 1 and 3/4 cups of balsamic syrup – enough for the summer)

1 cup of packed soft brown sugar

1 cup / 8 fl oz / 284ml of good quality balsamic vinegar

To serve:

Fresh sliced strawberries, blueberries, vanilla ice cream or crème fraîche

Action:

Combine the soft brown sugar and balsamic vinegar in a heavy pan and slowly bring to a boil, stirring to dissolve the sugar. Turn down the heat and simmer for 5 minutes. Cool and store at room temp in a clean screw-top jar.

Scoop the ice cream into pretty serving glasses; top with sliced strawbs and blueberries, then drizzle a large teaspoon of balsamic caramel all over to serve.

Notes:

Grilled peaches 028Another idea; how about drizzling some balsamic caramel over warm, ripe, grilled peaches? Top with a blob of crème fraîche and perhaps some toasted almonds or pistachios. Simplicity at it’s best.

The balsamic caramel lasts for ages and there’s no need to refrigerate it. If you do, it will become too thick to pour. I figured that as balsamic vinegar and sugar last a long time, so should this…and it does. I made my current batch in December.

I’m partial to vanilla ice cream made exclusively from coconut milk; it’s so delicious and creamy – in fact the brand name is ‘So Delicious’ and is 100% organic. It also comes in chocolate and coconut flavors but for this dessert, stick to vanilla. Wonderful stuff!

Balsamic Caramel-Infused Strawberries with Crème Fraîche

Balsamic Caramel-Infused Strawberries with Crème Fraîche

Note: You can slice the strawberries and macerate them in a spoonful of balsamic syrup. Cover and chill in the fridge for an hour or so. Serve with whipped cream or my preference, crème fraîche  for a more grown-up dish of strawberries and cream.

Posted in Desserts, Gluten Free Desserts | 5 Comments

Recipe: Flourless Chocolate Truffle Cake

Not so much a cake, more a massive chocolate truffle that you’d slice thinly and share – or not, depending on what a greedy little choco-piggy you are.

If you don’t love chocolate, then you can join the ranks of an old ex who claimed to be “violently allergic” to garlic, fresh herbs and chocolate. I always had my suspicions about him especially as he regularly ate chocolate.

Assuming that you’re not allergic to chocolate, it will be love at first bite with this devilishly dark and handsome cake. It’s easy to make and the most challenging part will be prepping your spring-form/loose based cake pan.

The usual notes at the end:

Flourless Chocolate Truffle CakeCHOCOLATE TRUFFLE CAKE

(Serves 16 – it’s very rich)

Ingredients:

1 cup (240ml) of water

¾ (180ml measure) cup sugar

9oz (255g) plus 1 tablespoon of butter, chopped

18oz (512g) of best quality semi sweet chocolate chips, such as Ghirardelli

6 large eggs

For the chocolate ganache topping:

1 cup (240ml) measure of heavy whipping cream

8oz (228g) of semi sweet chocolate chips

Lightly sweetened whipped cream to serve

Action:

Pre-heat oven to 350F / 180C

Butter a loose based 10 inch diameter cake pan and line the base with baking parchment. Butter the parchment. Wrap three layers of heavy duty foil around the pan up to the top of the rim. Make sure it’s nice and tight.

In a heavy pan, dissolve the sugar in the water, stirring over med heat. Bring to a boil then reduce to a simmer for 5 minutes. Turn off the heat and set aside.

In another saucepan, melt the butter over a low heat. Whisk in 3 cups of chocolate chips and continue to whisk until smooth. Turn off the heat, whisk in the sugar syrup until its well blended and allow it to cool slightly.

In a large bowl, lightly beat the eggs and add them to the chocolate mixture. Whisk well until completely blended then pour the batter into the prepared cake pan.

Put it in a large, deep roasting pan and fill the roasting pan with hot water to come halfway up the sides of the cake pan.

Bake in the middle of the oven for approx 50-60 mins or until the center no longer wobbles when you gently shake the pan.

Remove it from the from the water bath, transfer to a rack and allow to cool completely in the cake pan.

For the ganache topping:

Bring the cream to a simmer in a pan over medium heat – remove from the heat, add the chocolate chips and whisk until smooth. Pour over the cooled cake in the pan and smooth over to distribute evenly. Refrigerate for a minimum of 2 hrs; any longer and up to 2 days, cover it with cling film.

To serve: it needs to be chilled to cut…dip a thin knife in hot water and run it around the edge of the pan to loosen it; remove from the pan then slice very thinly; serve at room temp with whipped cream.

Notes:

This will freeze.

A great secret weapon I like to use with chocolate cakes, cheesecakes, brownies, sorbet, ice cream etc., is to add oil of citrus zest. Tangerine, orange and lime zest oils are available online.

When making chocolate fudge brownies, the combination of added walnuts and tangerine zest oil is magical. My favorite brownie has toasted hazelnuts with lime zest oil and if you have an ice cream maker try making a dark chocolate lime zest sorbet…incredible!

Posted in Desserts, Gluten Free Desserts | 4 Comments

Recipe: Perfect Grilled Chicken

A friend recently announced she’d got some chicken pieces in her fridge but didn’t know what to do with them so she ate out instead.

On that note, it’s only fair that I share this recipe; I’ve been cooking boned chicken portions this way for years; it’s foolproof and you’ll have a supremely moist and fragrant chicken dinner in less than 30 mins (excluding marinade time).

You can whip up the marinade in a couple of minutes after your morning espresso and you’ll enjoy really delicious chicken 4 – 24hrs later with little or no further effort from you, other than turning over the chicken to brown on both sides.

In the summer I’ll do this outside on a BBQ grill, otherwise I cook it on the stove top in a heavy ridged-bottomed grill pan.

Serve with whatever you like veggie-wise or slice thinly and throw onto a Caesar or your favorite salad; use as a pizza topping, etc.

If you have a pestle and mortar it helps to create a creamier marinade; you’ll see why…

Notes at the end.

cetera.com

CHICKEN GRILLED with ROSEMARY, GARLIC & LEMON

(Serves 2-4, depending on the size of each piece)

6 boneless, skinless chicken thighs or breasts, preferably organic

2 peeled garlic cloves, roughly chopped

1 teaspoon of coarse sea salt

The finely grated zest and juice of 1 small lemon

4 tablespoons of extra-virgin olive oil

2 tablespoons of chopped fresh rosemary

Half a bay leaf

A good grind of black pepper

Action:

Start by uniformly flattening the chicken portions to approx half an inch thick; place each piece between two layers of cling film and pound the fatter parts gently with a rolling pin or empty wine bottle until suitably flattened. Place them in either a shallow baking dish or a large, sealable plastic bag.

For the marinade; using a pestle and mortar if you have one (see notes); pulverize the garlic and sea salt together until you have a creamy emulsion. Whisk together with the remaining ingredients and pour this over the chicken, making sure everything is well coated.

Marinade in the fridge for a minimum of 4 hours and up to a day. Remove the bay leaf.

Heat up your grill/grill pan until smoking hot (no need to oil) and without overcrowding, sear the chicken until you have nice grill marks on both sides. Lower the heat and continue to turn every few minutes to get both sides nicely browned and until the chicken is no longer pink in the middle.

Delicious and juicy whether eaten hot or cold.

Notes:

If you don’t have a pestle and mortar, crush the garlic through a press and use a fine grain sea salt. Whisk all the marinade ingredients together well.

Costco is great value for organic chicken and their boneless, skinless thighs come in handy sealed packets, each with enough for 2 people.

Crowding everything into the pan at once will result in steaming the chicken rather than browning it. This goes for all pan-grilled meats, fowl, fish, etc., so always do a couple of pieces at a time for best results.

Posted in Poultry | 1 Comment

Two Recipes: Perfect Potatoes (roasted with garlic & rosemary – and baked with lemon & olives)

Here are two easy and delicious ways to serve the humble spud; first, a low fat twist on the well known recipe for Greek lemon potatoes which are usually baked in about half a pint of olive oil.

This version goes well with roast leg or shoulder of  lamb (a traditional English lunch); roast chicken, turkey, pork  – or fish.

Vegetarians can replace the chicken broth with water and if like me you make your own Moroccan preserved lemons, use finely minced preserved lemon as a condiment instead of sea salt. Don’t use both or you’ll find yourself overly-salinated.

If you’re lucky enough to own a Mandoline and still have fingers left on your grating hand, this is a breeze to prepare and if someone wants to buy me a French Mandoline with a foolproof safety blade, I’d be thrilled!

Until then I use a very fine-bladed knife to slice the potatoes so that they’re translucently thin.

For those of you who enjoy a crispy roasted spud, the second recipe combines garlic and rosemary and is a robust accompaniment to lamb, pork, chicken, turkey – or whatever.

Notes at the end.

Blog, lemon bakes potatoes with olives

POTATOES BAKED with LEMON, THYME & BLACK OLIVES

(Serves 4)

Ingredients:

6 medium sized red skinned potatoes

1 clove of garlic cut in half

Juice of one lemon

1 cup of organic chicken broth or water

Sea salt OR finely minced preserved lemon (see previous blog), to taste

Few sprigs of fresh thyme

A handful of pitted kalamata olives, rinsed

Extra-v olive oil

Freshly ground black pepper

Action:

Pre-heat the oven to 350F / 180C

Rub the cut garlic clove all over the inside of a shallow gratin baking dish – discard the garlic.

Peel the potatoes and slice extremely thinly. Layer in the dish with a sprinkle of thyme leaves; season with salt or preserved lemon and a small grind of black pepper as you go.

Scatter the remaining thyme leaves and olives on the potatoes and pour over the combined lemon juice and chicken broth or water.

Drizzle with olive oil, cover with foil and bake for 1 hour.

Remove the foil and bake for another 20-30mins until the top is golden and the potatoes are tender when pierced with a sharp knife.

And now for…..

BLOG roast potatoes and sunchokes with rosemary and garlic 001

OVEN ROASTED POTATOES & SUNCHOKES WITH GARLIC & ROSEMARY

This recipe can be made with just red skinned potatoes if you can’t get Jerusalem artichokes/sunchokes; it’s just as good.

(Serves 4-6)

Ingredients:

2lbs/900g of combined sunchokes/Jerusalem artichokes and small red skinned potatoes

2 garlic cloves, finely chopped

2 tablespoons fresh rosemary, finely chopped

2 tablespoons of extra-v olive oil

Sea salt, freshly milled black pepper

Action:

Pre-heat the oven to 425°F / 220°C

Wash the potatoes (and sunchokes if using) but don’t peel them.

Cut them into cubes approx ½ in /1cm and roll in a dry dishcloth to remove excess moisture.

Put the 2 tablespoons of olive oil in a roasting pan and stick in the oven for a few minutes until the oil is really hot.

Very carefully add the cubed potatoes and sunchokes to the hot oil, sprinkle with the rosemary and garlic and toss around to coat with oil.

Return to the oven and roast for 25-30 minutes or until the potatoes are golden brown and crisp – give them a toss in the pan halfway through.

Season well with sea-salt and ground black pepper to serve.

Notes:

Jerusalem artichokes, AKA sunchokes, sunroot, earth apple or topinambour are the tubers of a sunflower native to North America and have a lovely nutty taste. They can be baked, roasted, boiled, etc. Cut and paste this helpful link to cooking with these knobbly oddities:

http://homecooking.about.com/od/howtocookvegetables/a/sunchoketips.htm

A final word of caution: you can make this entirely with Jerusalem artichokes/sunchokes but if you eat an excess quantity of them, you may be temped to rename them Jerusalem ‘fartichokes’. 🙂

Posted in Vegan, Vegetables / Vegetarian | 2 Comments