Recipe: Braised Wild Mushrooms with Mint & Garlic

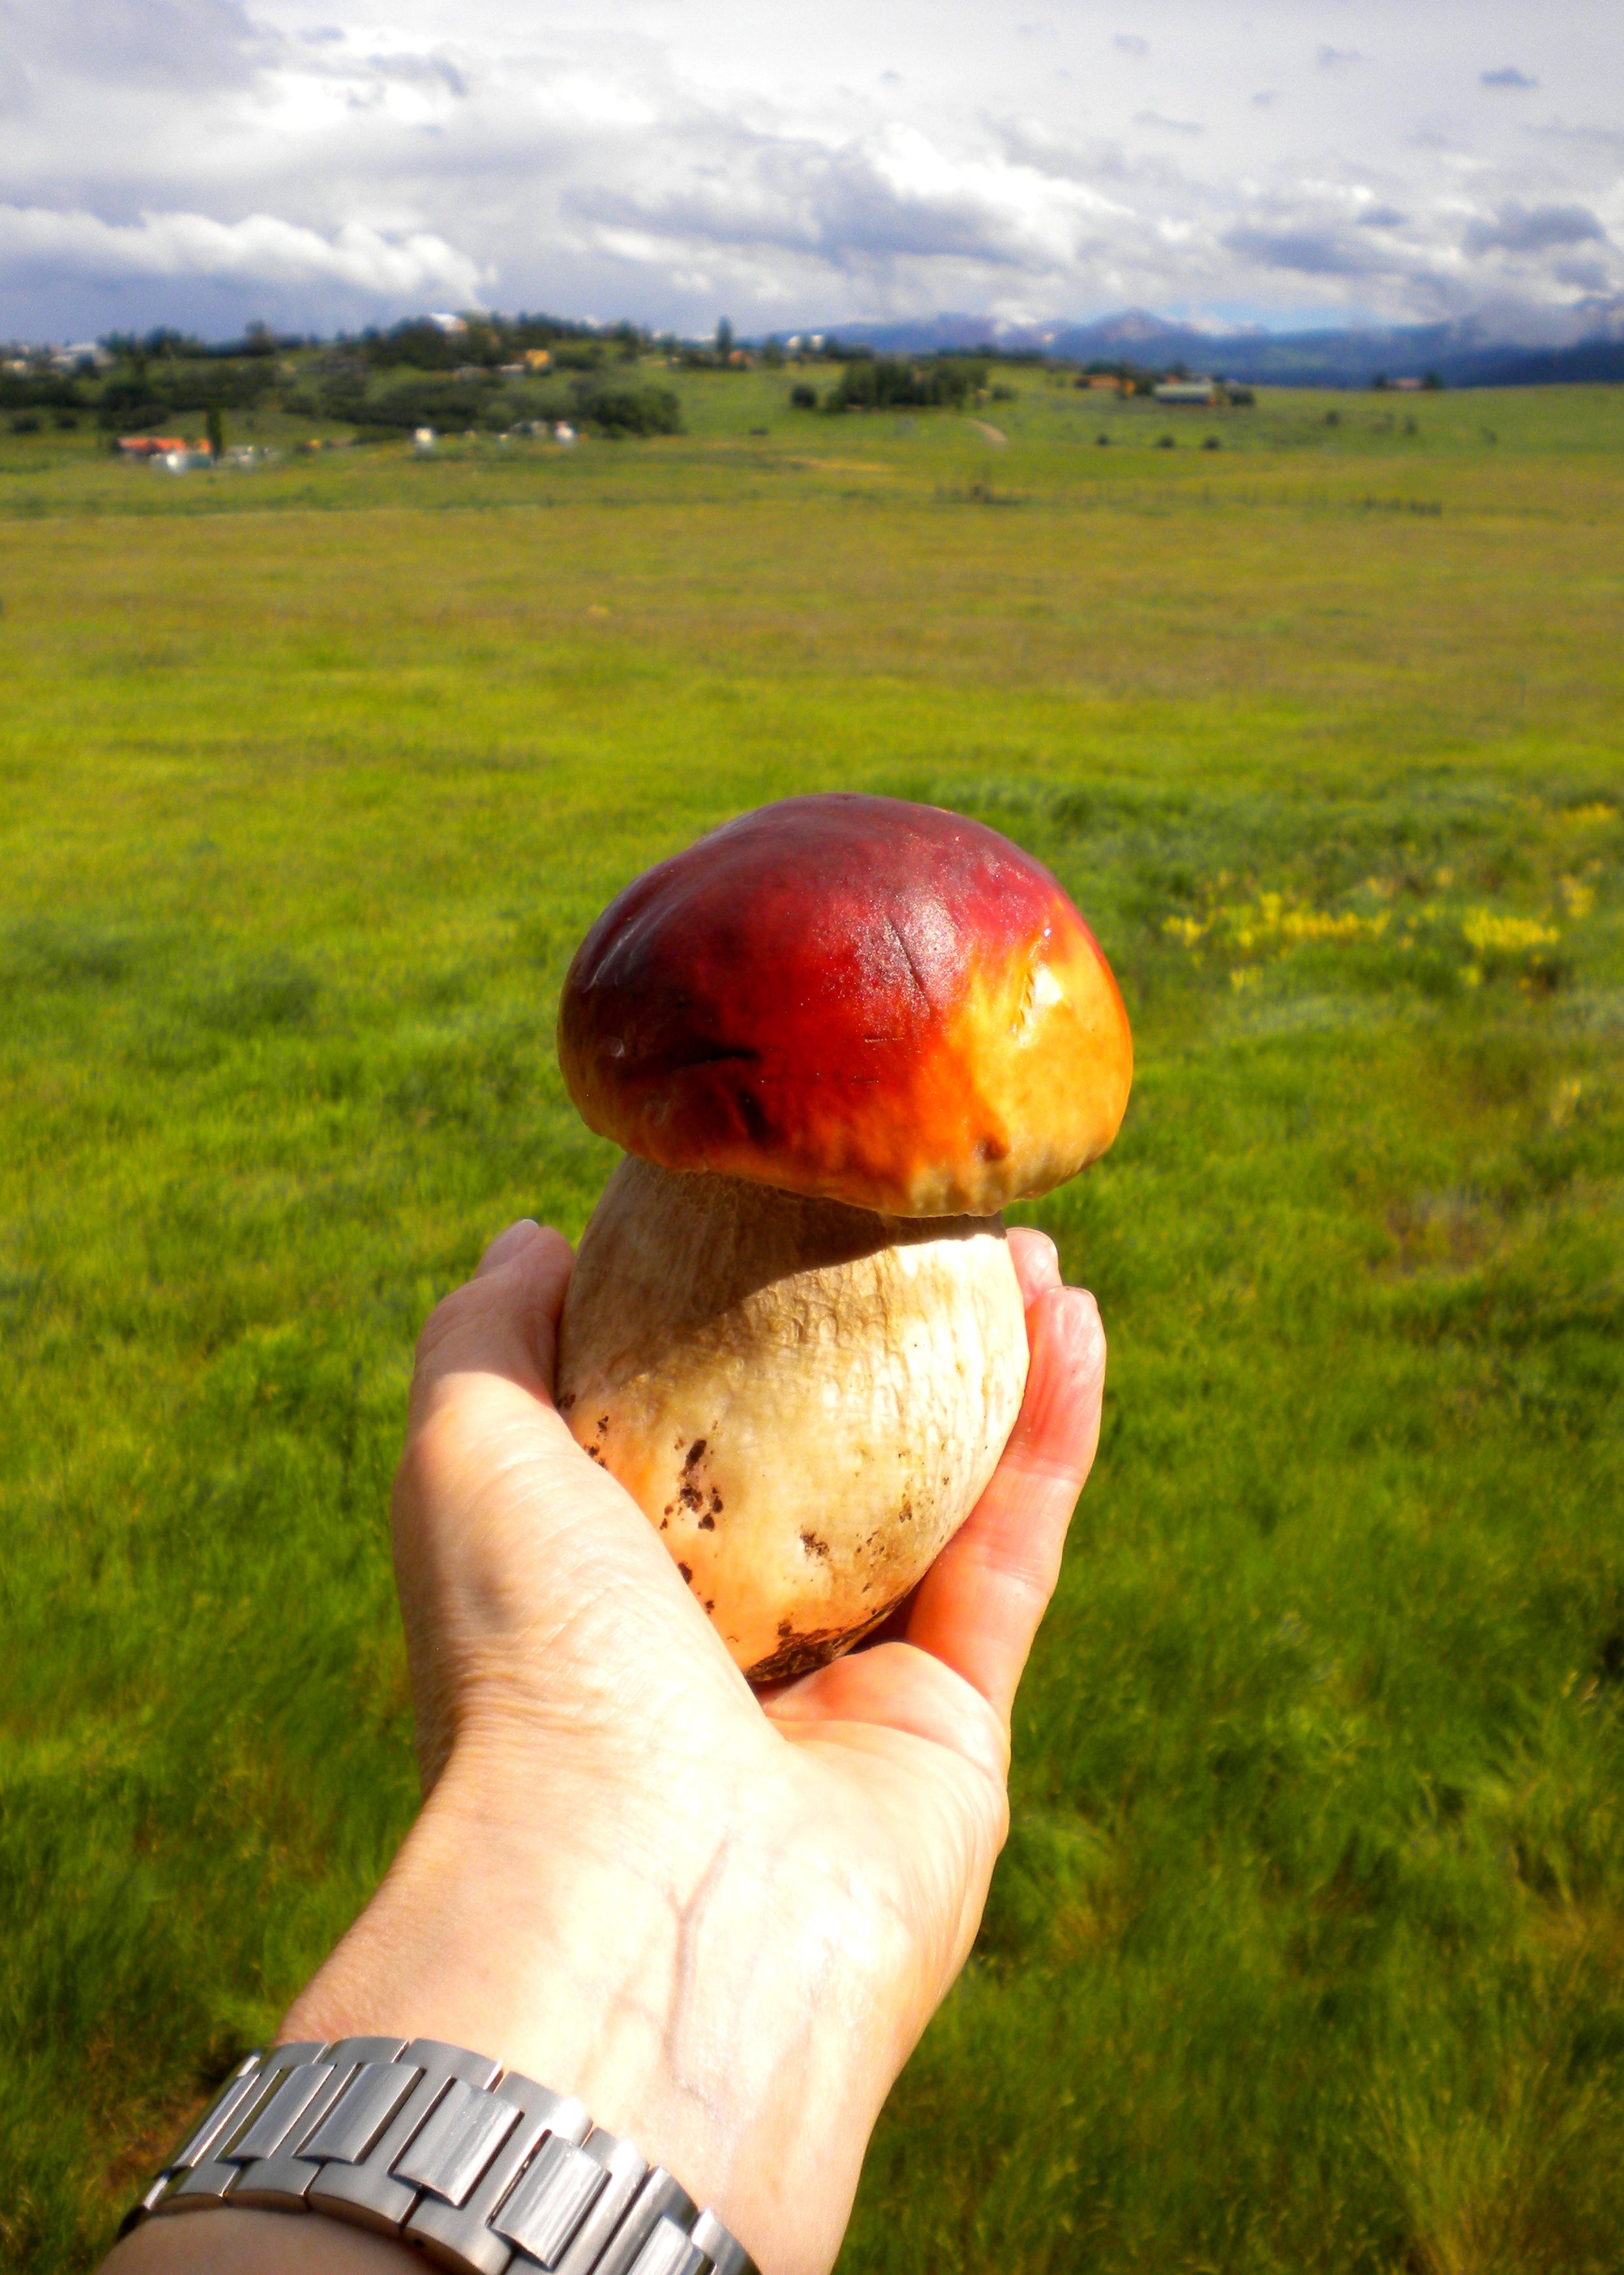
Strictly for mushroom lovers – and if you’ve found some wild edible funghi (of the non-trippy variety), then this simple preparation is a lovely way to serve them as a side dish that goes with just about anything you like to serve mushrooms with. Otherwise baby portabella/brown chestnut mushrooms will do.

Assorted Cultivated Mushrooms

Assorted Cultivated Mushrooms

Those little cultivated clusters of what look like something the fairies would dance around would also be good but you wouldn’t need to slice the small ones.

You could also try replacing the fresh mint with some finely grated fresh ginger, but reduce the amount considerably as you don’t want it to overwhelm the ‘shrooms. Start with a quarter teaspoon and build from there.

You don’t have to use dried porcini as they can be quite expensive (unless like me you dry the ones you find and store them in an airtight container). I don’t really recommend dried shitake as they can be a little tough and musty-tasting but dried oyster mushrooms or another edible variety will do. Supermarkets sell them in little packets.

Braised Wild Mushrooms with Mint & Garlic

Braised Wild Mushrooms with Mint & Garlic

BRAISED WILD MUSHROOMS WITH MINT & GARLIC

(Serves 4 as a side dish)

Ingredients:

2 oz (56g) dried porcini

1.5 lbs ( 0.7 kilo) of fresh mushrooms – or a combination cultivated and/or wild

4 tablespoons of extra-v olive oil

2 fat cloves of garlic, minced

2 sprigs of fresh mint and 3 tablespoons of finely chopped mint leaves

Sea salt & freshly ground black pepper to taste

Action:

In a bowl, cover the dried mushrooms with very hot water and allow them to soak for 30-40 minutes. To strain and reserve the soaking water, tip the mushrooms and their liquid into a paper-towel lined strainer, over a bowl. Rinse the drained mushrooms, chop them finely and add them to the reserved soaking liquid. Set aside.

Porcini 7.2015Wipe the fresh mushrooms clean with a damp cloth then slice them, unless you’re using the skinny little mushrooms that come in small clusters, in which case just separate them out.

Heat the olive oil in a deep sauté pan and add the chopped garlic, mushrooms and sprigs of mint. Stir well to coat with the oil and continue to sauté, stirring frequently until the mushrooms have softened and released quite a bit of liquid.

Add the chopped dried mushrooms with all their soaking liquid to the pan, stir well to combine then cover the pan with a lid. Reduce the heat to moderately low and simmer for 20 mins.

Remove the lid, add most of the chopped fresh mint leaves, turn up the heat and continue to cook uncovered for another 5 mins or until you have just a couple of tablespoons of liquid left.

Season to taste with sea salt and freshly ground black pepper, pile the mushrooms into a warm bowl and sprinkle with the remaining chopped mint to serve.


Posted in Vegan, Vegetables / Vegetarian | 2 Comments

Recipe: Tuscan Chickpea Stew with Chard

Adapted from a classic Tuscan dish ‘Cacciucco di Ceci’ this deliciously earthy recipe falls  somewhere between a stew and a soup.

Strict vegetarians could replace the chicken broth with water but honestly, to leave out the anchovies would be like leaving out the chocolate chips in a chocolate chip cookie recipe. They add an essential yet indefinable richness and anchovy-haters will never know they’re there.

You could also cheat and use canned chickpeas but I made this from scratch and soaked dried chickpeas overnight.

Note: if you have any Parmesan rinds in your freezer (I always freeze parm-rinds as they’re wonderful for adding flavor to soups), you could add one or two along with the broth.

Tuscan Chickpea Stew with Chard

Tuscan Chickpea Stew with Chard

TUSCAN CHICKPEA STEW with CHARD

(Serves 4-6)

Ingredients:

1 cup (240ml) measure of dried chickpeas (garbanzo beans)

8 oz (230g) of chard, rinsed and chopped

1/3 cup (70ml) of extra-v olive oil

8 anchovy fillets from a can

1 large onion, peeled and thinly sliced

2 fat cloves of garlic, peeled and chopped

1/4 teaspoon of dried chili flakes

Freshly ground black pepper

1 tablespoon of tomato paste (puree)

Chicken broth, preferably organic (or water) – enough to cover, maybe 1-1.5 cartons

4-6 slices of crusty Italian bread, about an inch (25mm) thick

Freshly grated Parmigiano Reggiano or Percorino to serve

Action:

Start at least 6 hours ahead by soaking the chickpeas in plenty of cold water. Drain them and rinse thoroughly under cold running water. Drain again.

In a large pot with a lid, heat 3 tablespoons of the olive oil then add the anchovy fillets. Squish them until they break up and dissolve in the oil. Add the onion and garlic and continue to cook over a low heat until they’ve softened but not browned.

Add the drained chickpeas and give them a good stir to coat with oil. Add the chard, chili flakes and plenty of freshly ground black pepper. Add enough broth or water to cover by approx 1/2 inch (12mm), then stir in the tomato paste. Bring to a boil, stir thoroughly and lower the heat to a simmer. Cover with a lid and simmer for about 2 hours or until the chickpeas are soft. Add more broth/water if necessary.

Before serving, lightly toast the bread slices and rub them on one side with a cut clove of garlic. Place a slice of toast in the bottom of each soup bowl and drizzle with the remaining olive oil (I like to use chili oil for an extra kick).

Pour the hot soup/stew over each slice, top with grated cheese and serve immediately, perhaps with some extra garlic-rubbed toast on the side for dunking.


Posted in Fish & Seafood, Soups, Vegetables / Vegetarian | Leave a comment

Recipe: Cauliflower with an Avocado Tahini Dressing

I love cauliflower and even in it’s raw state, the texture is perfect – not too tough.

However, there seem to be so few recipes for cauli out there, maybe because it lacks color and isn’t particularly eye catching on the plate, so I’m always on the lookout for something a bit different.

This certainly is – I found the recipe in one of my mother’s ancient vegetarian cookbooks ‘Middle Eastern Vegetarian Cookery’ by David Scott, originating from the early 1980’s.

The recipe needed a bit of adjusting, which I did. I also finished it off with a drizzle of chili oil.

So here it is – an interesting way to serve cauliflower and I think it’s best served at room temperature.

Cauliflower with an Avocado Tahini Dressing

Cauliflower with an Avocado Tahini Dressing

CAULIFLOWER with an AVOCADO & TAHINI DRESSING

(Serves 4-6 as a side dish)

Ingredients:

1 medium sized cauliflower, broken into largish florets

The juice of a large lemon plus extra for the dressing

1 large ripe avocado (no brown bits)

8 fl oz (230ml) of Tahini (sesame seed butter)

Sea salt

2 tablespoons of lightly toasted sesame seeds

Lettuce leaves to serve

Chili oil (optional)

Action:

Put the cauliflower florets in a pan and just cover them with water. Add the lemon juice and bring to a boil, reduce the heat and simmer for a few minutes until the cauliflower is just tender. Drain and set aside to cool.

Preferably in a food processor, combine the avocado with the tahini paste and with the motor running, add extra lemon juice and/or water until you have a thick, smooth dressing. Season with sea salt to taste.

Arrange the cooled cauliflower on a bed of lettuce, top with the avocado tahini dressing, toasted sesame seeds and finish it off with a drizzle of chili oil.


Posted in Vegan, Vegetables / Vegetarian | 5 Comments

Recipe: Prosciutto & Brie Frittata

Here’s something that’s easy to put together and is delicious eaten straight from the pan or served at room temperature, making it perfect for picnics, packed lunches, etc.

I usually make one a week using whatever vegetables and cheese I have to hand; sometimes with cooked chicken, salmon or prosciutto, sometimes without, so this can be adapted to suit meat eaters and egg-eating vegetarians alike.

Best of all, it can be made in under 20 minutes. Dress it up with a mixed leaf salad with a lemony dressing for a perfect light lunch.

Prosciutto and Brie frittata 007PROSCIUTTO & BRIE FRITTATA

(Served 4)

Ingredients:

9 oz (250g) of ready-washed baby spinach leaves or shredded kale leaves (steamed first to soften them)

2 tablespoons of olive oil

Half a red onion, finely minced

6 slices of wafer-thin prosciutto, cut into pieces

8 large eggs, preferably organic

2 tablespoons of cream

2 oz (50g) of not too-ripe farmhouse brie, cut into small chunks

a tablespoon of grated Parmigiano Reggiano cheese (optional)

Action:

Heat the oil in a deep ovenproof skillet / sauté pan with a lid and when hot, add the minced onion, sautéing until it’s softened and starting to brown slightly.

Add the raw baby spinach or wilted kale leaves and give it a good stir until the spinach (if using) has wilted a bit. Add the prosciutto.

Meanwhile, beat the eggs, fold in the cream and diced brie – season with a little sea salt (prosciutto can be a bit salty so go easy) and lots of freshly ground black pepper.

Tip the egg and brie mixture onto the spinach mixture in the pan and stir slightly to distribute everything evenly.

Prosciutto and Brie frittata 003Over a moderately low heat, allow the eggs to begin to set around the edges. Sprinkle the grated Parmigiano Reggiano over the top and put the lid on. Allow it to cook for about 4-5 minutes or until the eggs are completely set and puffed up.

If you want to brown the top, stick it under a hot grill/broiler for 30 seconds or so.

Can be eaten right away or cooled and served at room temp, rather like a crustless quiche.


Posted in Made in Under 30 mins, Meat | Leave a comment

Recipe: Chocolate Caramel Fudge Brownies (Gluten-Free)

Rich, dark, chewy, fudge-y, moist and utterly decadent – these brownies are made with ground almonds instead of flour and have an entire can of *boiled, caramelized condensed milk swirled into the batter just prior to baking.

The only other thing you might need is some really great vanilla ice cream.

Happy Fourth of July weekend to you all!

Gluten-Free Chocolate Almond Caramel Fudge Brownies

Gluten-Free Chocolate Almond Caramel Fudge Brownies

GLUTEN-FREE CHOCOLATE CARAMEL FUDGE BROWNIES

(Makes up to 24 brownies)

Ingredients:

11 oz (300g) of dark chocolate, chopped

9 oz (250g) of unsalted butter at room temp

2 teaspoons of pure vanilla extract

5 large eggs

11 oz (300g) of sugar

7.5 oz (200g) of ground almonds

1 tablespoon of baking powder

The contents of one 14 oz (397g) of condensed milk that’s been *boiled

Action:

*Start at least a few hours or a couple of days before by preparing the caramel. Put the can of condensed milk in a very large pan with a lid, cover completely with water and bring to a boil. Reduce to a simmer and continue to simmer for 2 hrs. Drain and allow the can to cool completely before opening.

The contents will have become a deep golden caramel – delicious over ice cream too!

Line a 12 x 9 inch (30 x 23 cm) cake tin with parchment.

In a bowl set over a pan of barely simmering water, slowly melt the chocolate and butter then set it aside to cool for a few minutes.

Meanwhile, beat the eggs and vanilla with the sugar until pale and foamy.

Pre-heat the oven to 375F (190C).

Using a large metal spoon, carefully fold the melted chocolate and butter into the beaten egg mixture, followed by the ground almonds and baking powder – blend thoroughly with a cutting motion to combine everything.

Pour the batter into the prepared baking pan then spoon the entire contents of the can of caramelized, condensed milk onto the batter and using the point of a knife, swirl it into the cake mixture.

Bake for 40-50 minutes or until the top is set but the inside is still moist when pierced with a skewer.

Cool completely in the pan on a rack before inverting onto a board and cutting into squares.

These moist brownies will keep in an airtight container for up to a week and in the unlikely event you ever have any left, they freeze well.


Posted in Cookies & Edible Gifts, Desserts, Gluten Free Desserts | Leave a comment

Recipe: Asian Spiced Turkey Burgers

With the Fourth of July looming (looming in the US, that is), everyone here is already planning what to throw on the barbie/grill to celebrate their independence from us Brits.

The usual beefburger fare is traditional and generally delicious, especially this version with mustard and dill – but what about the people who don’t eat red meat?

Well look no further – this turkey burger with Thai spices is absolutely wonderful and is as juicy as heck.

So – get grilling. Even if you’re a 100% dyed-in-the-wool beef freak, you’re absolutely going to want one of these.

Asian-Spiced Turkey Burger

Asian-Spiced Turkey Burger

ASIAN-SPICED TURKEY BURGERS

(Serves 4)

Ingredients:

1 lb (453g) of lean ground turkey, preferably organic

2 fat cloves of garlic, minced

1-2 tablespoons of Thai red curry paste (depending on how much heat you like)

2 tablespoons of grated fresh ginger

1 tablespoon of best quality mayonnaise

4 green onions/scallions (spring onions) white and pale green parts only, finely chopped

2 tablespoons of finely chopped fresh basil leaves

A pinch of sea salt

To serve:

Burger buns, Ciabatta buns, pita bread or whatever you prefer

About half a cup (120ml) of mango chutney

A good handful of fresh cilantro (coriander) and a few fresh mint leaves – roughly chopped

Action:

For the burgers, combine the first 8 ingredients in a large bowl and carefully blend with a fork. With wet hands, form into 4 patties and chill them covered in the fridge, for 10-15 minutes.

Meanwhile, preheat the BBQ grill or if you’re cooking on the stove-top, a heavy, ridged grill pan.

When the grill/grill pan is hot, brush or spray with oil then add the burgers – cook undisturbed over a medium high heat for 6 minutes. Carefully turn them over and cook for another 6 minutes (You need them to be cooked right through).

While the burgers are cooking, warm or lightly toast the halved buns. Spread generously with mango chutney, add a good sprinkling of chopped cilantro/mint and sandwich the warm burger in between.

Looking for an easy luscious red, white & blue dessert? Summer berries with a balsamic caramel over ice cream, fits the bill perfectly.

Happy Fourth!


Posted in Indian & Asian Cuisine, Made in Under 30 mins, Poultry | 3 Comments

Recipe: Lemon, Almond & Elderflower Cake

Here’s an adaptation of the wonderful Sicilian clementine cake recipe I posted  back in February; this time it’s made with lemons and has a delightful tang. I used the same amount of sugar because the drizzle of elderflower syrup onto the hot cake adds the right amount of floral sweetness.

For lemon-lovers, this cake is a classic.  It contains a lot of ground almonds and I like to use all organic ingredients so it’s not inexpensive to make – but for special occasions it’s an absolute treat.

Moist to the point of squelchiness, I recommend serving it with crème fraîche and perhaps some berries on the side.

Lemon, Almond & Elderflower Cake

Lemon, Almond & Elderflower Cake

LEMON, ALMOND & ELDERFLOWER CAKE

(Serves 10)

Ingredients:

13 oz (375g) of thin-skinned lemons, preferably organic

6 large eggs

1 and a 1/4 cups (9 oz / 255g) of white cane sugar

2 and a 1/4 cups (8 oz / 227g) of ground almonds

1 level teaspoon of baking powder

6-7 tablespoons of elderflower syrup

Action:

Put the lemons in a large pan and cover with plenty of water. Bring to a boil and simmer for 2 hrs. Remove them from the water and allow to cool. Once they’re cool enough to handle, break them open and discard the seeds, being careful not to lose any of the cooked flesh.

Grease and line an 8-10 inch (20-25cm) spring-form cake pan and preheat the oven to 375F (190C).

Put the cooled fruit into a food processor and pulse until you have a lovely lemony slurry. Beat the eggs with the sugar until they’re pale and foamy then using a large metal spoon, fold in the ground almonds, baking powder, followed the pureed fruit. Stir well (don’t beat) to combine, then pour the batter into the cake pan.

Bake for 35 minutes then check to see if the top is browning. If it is, cover it with a piece of foil then continue to bake for another 20 minutes, or until a skewer inserted in the middle of the cake comes out clean.

Remove the cake from the oven and while hot, pierce it all over with a toothpick then carefully drizzle the elderflower syrup over the hot cake.

Allow the cake to cool in the pan on a rack. Once cooled it can be removed from the pan and stored in an airtight container at room temperature for several days.

There’s nothing wrong with eating it right away but it will taste even better if you can wait 24-48 hrs.

Posted in Desserts, Gluten Free Desserts | Leave a comment

Recipe: Shrimp Basil Fried Rice with Garlic & Chili

Ever looked at a bowl of plain leftover rice and felt completely uninspired?

Well here’s some inspiration for you; in less than 15 minutes and with very little effort, plain boiled rice can be transformed into a deliciously fragrant and fiery main dish.

I recommend using wild-caught Key West shrimp if you can find them – they’re so much nicer than the Indonesian farmed variety.

You’re supposed to use a wok for this but I make it in a deep sauté pan and it tastes every bit as Asian.

Shrimp Basil Fried Rice with Garlic & Chili

Shrimp Basil Fried Rice with Garlic & Chili

SHRIMP & BASIL FRIED RICE WITH GARLIC & CHILI

(Serve 4)

Ingredients:

3 tablespoons of vegetable oil (I recommend avocado or grape seed – they’re better for high temp cooking)

A pinch of salt

3 cloves of garlic, finely minced

2 small serrano or red chilies, seeded and chopped

8 -10 oz (230-280g) of raw, peeled and de-veined shrimp

4 cups of cooked rice

2-3 tablespoons of low sodium soy sauce or tamari

1 and a half tablespoons of Nam Pla (Thai fish sauce)

1/4 teaspoon of sugar

3 green (spring) onions – white and green parts, chopped

A good handful of basil (Thai basil if you can find it)

a couple of heaped tablespoons of chopped fresh cilantro (coriander leaf)

Action:

Start by heating the pan or wok over a medium to high heat and once it’s  hot, add the oil, minced garlic and salt. Stir until the garlic is golden (about 30 seconds) then add the chopped chilies and shrimp and stir fry for another 30 seconds or thereabouts, until the shrimp just begins to turn pink.

Add the rice and continue to stir-fry for 2-3 minutes to heat it through, then add the soy sauce, fish sauce and sugar. Mix everything together thoroughly.

Finally, add the chopped green onions and basil leaves and stir-fry until the basil starts to wilt – about 30 seconds.

Tip the lot into a warmed serving dish and scatter with the chopped cilantro/coriander.

Eat immediately.


Posted in Fish & Seafood, Indian & Asian Cuisine, Made in Under 30 mins | 3 Comments

Recipe: Roast Salmon with Asian Spices

This has to be one of the most delicious ways to serve a filleted side of salmon, assuming you like Vietnamese or Thai food.

It’s very simple to prepare and positively bursting with lots of flavor. Marinate the salmon for 1-4 hours then stick it in the oven for 18-25 minutes depending on the weight.

The caramelized sauce takes it to another level and you can prepare that about 30 minutes before you put the salmon in the oven.

I like to eat it simply with boiled white rice (sticky or basmati – whatever you prefer), spiked with chopped fresh cilantro and mint but you can make a total feast of it; serve some julienned carrot, cucumber and spring onions; fresh mint and cilantro (coriander) leaves; a few crushed peanuts and thinly sliced red chili on the side with some fresh lime wedges to squeeze over and perhaps an extra sprinkle of ‘Nam Pla’ (Thai fish sauce) to go around.

Absolutely delicious!

Roast Salmon with Asian Spices

Roast Salmon with Asian Spices

ASIAN SPICED ROAST SALMON

(Served 4)

Ingredients:

A whole side of salmon fillet, skin-on and weighing approx 2 lbs (1kilo)

For the marinade:

I medium sized red chili, thinly sliced and de-seeded if you don’t want it too hot

2 inch piece of fresh ginger, peeled and grated or finely chopped

A handful of fresh cilantro (coriander leaves) chopped

1 medium sized shallot, minced

1 medium clove of garlic, minced

1 tablespoon of oil (I use avocado or grapeseed. Peanut oil will also be good)

1 Tablespoon of ‘Nam Pla’ (Thai fish sauce)

For the sauce:

3.5 oz (100g) of sugar

1 tablespoon of water

The finely grated zest and juice of 1 lime

3 tablespoons of ‘Nam Pla’ (Thai fish sauce)

Action:

Roast Salmon with Asian Spices

Roast Salmon with Asian Spices

Line a shallow roasting pan with foil and place the salmon skin-side down in the middle.

Combine all of the marinade ingredients together and spread it evenly over the fish. Set aside, covered for at least one and up to 4 hours. (If more than one hour, put it in the fridge and take it out 30 minutes before you’re ready to bake it).

In a heavy saucepan, gradually melt the sugar and water until the sugar caramelizes to a golden color. Don’t let it burn. Take it off the heat and quickly stir in the lime juice, zest and fish sauce. It will steam and sizzle. Give it a good stir until everything has dissolved then set it aside for 5 minutes to cool slightly.

Meanwhile, preheat the oven to 355F (180C).

Roast Salmon with Asian Spices 005Pour the sauce over the salmon and it’s marinade. Bake in the oven for 18-25 minutes or until the fish is just cooked through and breaks apart with moist flakes.

It might be fun to allow people to help themselves and add their own salad-y stuff. The skin isn’t meant to be eaten unless you’re a diehard.

Chopsticks are also fun but not essential.


Posted in Fish & Seafood, Indian & Asian Cuisine | 3 Comments

Recipe – Sweet Potato Crisps

Barely a recipe, I’d been making these just as a treat for my dog until one day I decided to add a touch of pink Himalayan salt before baking them. They were so incredibly good that I now regularly make a dog-batch (no salt) and a human-batch.

Not only are they delicious but they’re highly nutritious and ridiculously easy to make.  Use organic sweet potatoes if possible and I like to use avocado oil but you could use any good quality cooking oil.

Not much else to say about them other than they won’t hang around for long. You’ll need a mandoline or a very thin, sharp knife plus oven-proof wire racks to bake them on; these  allow the air to circulate, resulting in a crunchy crisp.

Once cooled and dried out, they’ll keep in an airtight container for quite some time.

My dog will devour month-old crisps but I don’t suggest making them that far in advance for human consumption.

Sweet Potato Crisps

Sweet Potato Crisps

SWEET POTATO OVEN CRISPS

Ingredients:

Allow one medium organic sweet potato per person and approx 1/4 teaspoon of avocado or olive oil per sweet potato

A pinch of sea salt

Action:

Pre-heat the oven to 250F (120C)

Rinse and dry the sweet potatoes (don’t peel them). Using a mandoline or sharp knife, cut them as thinly as possible into rounds. Put the slices in a large bowl, add the oil and give them a good toss.

Zoe 3.09 006If you have a dog, take theirs out and spread them in a single layer on a wire rack.

For yours, add sea salt to taste, toss again and spread in a single layer on another wire rack.

Bake for 60 minutes or until they’re crisp. Allow to cool and dry out on the rack before storing.

*Note: if you live in a humid climate such as Florida they’ll probably never be as crisp as you’d like, in which case I’m sorry but you may need to resort to a deep-fryer (not quite as healthy) or a dehydrator.

Posted in Salads & Appetizers, Vegan, Vegetables / Vegetarian | 5 Comments