Recipe – Oven Roasted Ratatouille

This recipe is incredibly versatile and colorful; oven roasting the vegetables helps them keep their shape and intensifies their flavor with a hint of toastiness, unlike a traditional ratatouille that’s usually swamped in a tomato sauce.

You can use it in omelets or frittatas; it’s a perfect side dish for almost any grilled or roasted chicken, meat or fish; try it served over quinoa; with pasta (I like to add soft goat cheese and chopped kalamata olives) …and so-on.

It’s best served warm or at room temp and keeps well in the fridge for a few days, covered.

Blog, uncooked oven roasted ratatouille and shitake bacon 005

OVEN ROASTED RATATOUILLE

(Serves 4-6 as a side)

Ingredients:

1 lb (450g) of cherry tomatoes, skinned

1 small eggplant/aubergine

2 medium sized zucchini/courgettes

1 small to medium red pepper, seeded and cut into 1 inch (2.5cm) squares

1 small to medium yellow pepper, seeded and cut into 1 inch (2.5cm) squares

1 large red onion, peeled, root trimmed and cut into 1 inch (2.5cm) slices, with a bit of root still attached, to hold them together

2 large cloves of garlic, chopped

3 tablespoons of extra virgin olive oil

A good handful of fresh basil leaves, roughly torn

Sea salt, freshly ground black pepper

Action: Blog, cooked oven roasted ratatouille and shitake bacon 010

Oven temp 475F (240C)

Start by cutting the eggplant/aubergine and zucchini/courgettes into 1 inch (2.5cm) chunks.

Toss them in a heaped teaspoon of salt and pile into a strainer. Put a plate on top with a weight to press down and leave them in the sink to drain for 30-40 mins. This extracts excess moisture and any bitterness.

Rinse and pat dry in a towel.

Skin the tomatoes by cutting a tiny ‘x’ in the end and pouring boiling water over. After 1 minute, drain and slip the skins off.

Combine everything in a large bowl, season and give it a good toss to make sure the oil coats all the pieces.

Spread the vegetables in a shallow roasting tray and place on a high shelf in the pre-heated oven for 30-40 minutes.

Check on them at least once and stir everything around a bit. You want the edges to have a nice brown tinge here and there.

Serve hot, warm, or at room temp.

(A Delia Smith recipe)

Posted in Vegan, Vegetables / Vegetarian | 1 Comment

Recipe: Eton Mess (not really messy at all)

An interesting name for a delicious pud. Allegedly, the name came about after an accident long ago with a berry and cream-filled Pavlova (meringue), at a Etonian picnic. For those of you unfamiliar with Eton, its where upper-crusties send their brighter children to be educated in the hopes that they’ll end up going down (yes, really) to Oxford or Cambridge.

I don’t think it could have sounded quite as romantic if the happy accident had occurred at one of the other British public schools (i.e. fee paying) such as Stowe or Rugby. ‘Stowe Mess’ sounds oddly inedible; ‘Rugby Mess’ seems rather brutal.

Anyway, the smashed dessert was scooped up into dishes and tasted so good that it was given its own identity. So here it is……

Note: you can make your own meringues from scratch but it doesn’t seem necessary when good food markets such as Whole Foods (or Waitrose in the UK) sell excellent individual meringues. Wholefoods make their own meringues; plain, pistachio or lemon – all fabulous for making a mess such as this….they’re sold by weight and as they weigh next to nothing, you get a lot for your money.

Eton Mess

Eton Mess

ETON MESS

(Serves 6)

Ingredients:

3 cups of combined raspberries and sliced strawberries

5-6 good sized individual meringues

2 cups of whipped cream

A sprinkle of fine white sugar

Action:

Toss the strawberries and raspberries in a small amount of sugar and set aside.

Whip the cream until you have soft peaks and a quantity measuring 1 pint.

Break the meringues into approx one-inch chunks and fold into the whipped cream.

Layer the fruit and cream/meringue mixture into pretty serving dishes.

Chill for 20-30 minutes before serving.

Posted in Desserts, Gluten Free Desserts, Made in Under 30 mins | 2 Comments

Recipe: Shiitake ‘Bacon’

When a friend told me about this I really didn’t believe them but tried it anyway…
astonishingly, the end result was deliciously bacon-y.

This is not so much a recipe; more like an amazing chemistry experiment in which a rather fusty-smelling shiitake mushroom is transformed into ‘bacon’.

Vegans and vegetarians should be hopping with delight and meat eaters could be fooled. Obviously, a small slice of shiitake won’t turn into a large rasher of bacon but you’ll have pieces big enough to add to salads, pizza, omelets, soup, baked potatoes with sour cream and anything else that cries out for a bacon flavor.

So throw away that ‘fake bacon’ made from processed soy and get slicing. This couldn’t be easier!

blog-uncooked-oven-roasted-shitake-bacon-014SHIITAKE ‘BACON’

Ingredients:

(Makes about 1 cup)

5 oz (160g) of thinly sliced fresh shiitake mushrooms (not dried)

2-3 tablespoons of extra virgin olive oil

Sea salt and freshly ground black pepper, if you like pepper bacon

Action:

Pre heat the oven to 350F (180C)

Toss the sliced shiitake in a bowl with 2-3 tablespoons of extra v olive oil – make sure everything is well coated and the mushrooms will really absorb a lot.

Add sea salt and freshly ground black pepper, if using.

Arrange in a shallow roasting pan in a single layer.

Oven temps vary so go by the color of the shiitake – roast for approx 25-30 minutes, giving them a good stir every 10 minutes until they’re a deep brown – you’ll want to take them out of the oven before they get burned black.

They’ll have reduced dramatically and there will be quite a bit of oil in the pan so transfer them with a slotted spoon onto a few sheets of paper towel to drain any excess oil.

I liked them so much I ate them all there and then, so had to make another batch.

Thanks, Dave!

blog-cooked-oven-roasted-shitake-bacon-020

Posted in Vegan, Vegetables / Vegetarian | 2 Comments

Recipe: Not just another Shrimp on the Barbie…add Rosemary and Lemon.

Before you decide to throw a shrimp on the BBQ, how about adding some real flavor?

Try threading big fat juicy raw shrimp onto rosemary twigs; with a squeeze of fresh lemon, some lemon zest, black pepper and a swipe of extra-virgin olive oil – you’ll have the most delicious, mouthwatering grilled shrimp in just a few minutes.

To prevent the rosemary from igniting on the grill, I recommend soaking the twigs in water for a few hours first and if the woody stalk end is a bit thick, sharpen it to a point with a knife so that it doesn’t make too big a hole in the shrimp.

You’ll need very large, cleaned raw shrimp – shell on.

I suggest about 3-4 shrimp per rosemary skewer. How many you make will depend on the size of your crowd and their capacity to eat shrimp.

Wholefoods and other quality food stores will sell good sized rosemary stalks; they’re usually folded up in their plastic container so look for those that have a decent woody end for spearing the shrimp. Better yet, cut twigs from your own rosemary bush.

Rosemary Grilled Shrimp

Rosemary Grilled Shrimp

ROSEMARY GRILLED SHRIMP

(Allow 4-6 shrimp and one rosemary ‘skewer’ per person)

Action:

Immerse the fresh rosemary in a large bowl of tepid water for a few hours – drain.

BLOG rosemary Barbi shrimp, rawSpear the cleaned, raw shrimp through the thickest part and very carefully slide them up the rosemary stalk, allowing space for 3-4.

Squeeze fresh lemon juice over the shrimp skewers; scatter with some finely grated lemon zest along with a good grind of black pepper. Drizzle with olive oil, cover and chill in the fridge for a couple of hours to allow the flavors to develop.

The grill needs to be smoking hot and these will only take a few minutes.

It still feels like summer!

Posted in Fish & Seafood, Made in Under 30 mins | Tagged | 2 Comments

Recipe – Chicken in a Sweet Red Pepper Sauce

Vegetarians should be happy with the Indian dishes I’ve posted so far – for those of you that need something more, this recipe will complete the menu perfectly.

‘Chicken in a Sweet Red Pepper Sauce’ has a spectacular thick red sauce that’s a perfect visual compliment to the other Indian recipes from my previous weeks’ blogs.

Easy to prepare, you’ll need a food processor and you can make everything ahead and chill for 2-3 days in the fridge, or freeze it. Freezing really enhances the flavors and intensifies the spices but at the very least, make it 2 days ahead for all the flavors to develop fully.

I prefer chicken thigh meat as it’s more succulent and being on-the-bone creates a better flavor. Don’t be tempted to cut back on the amount of oil as it carries the spices and if you want more heat, increase the amount of cayenne pepper.

Warm through gently to serve.

Chicken in a Sweet Red Pepper Sauce

Chicken in a Sweet Red Pepper Sauce

CHICKEN in a SWEET RED PEPPER SAUCE (Lal masale wali murghi)

(A Madhur Jaffrey recipe)

(Serves 4)

Ingredients:

2 ¼ lbs (1kg) of chicken thighs, on the bone and skinned

4 oz (110g) of onion, peeled and chopped

1 inch chunk of fresh ginger, peeled and chopped

3 cloves of garlic, peeled

1 oz (25g) of blanched almonds, preferably slivered

¾ lb (350g) of sweet red peppers, trimmed, seeded and chopped

1 tablespoon of ground cumin

2 teaspoons of ground coriander seed

½ teaspoon of turmeric

1/8 – ½ teaspoon of cayenne, or to taste

2 teaspoons of salt

6 or 7 tablespoons of vegetable oil

8 fl oz (225ml) water

2 tablespoons of lemon juice

½ teaspoon of freshly ground black pepper

Action:

Combine the onion, ginger, garlic, almonds, red peppers, cumin, coriander, turmeric, cayenne and salt in a food processor – pulse until you have a paste, pushing down the sides with a spatula as needed.

Heat the oil over a medium heat in a large wide pan. When hot, add the entire contents of the food processor and stir fry the paste for 10-12 minutes, until you see the oil forming tiny bubbles around the paste.

Add the skinned chicken pieces, 8 fl oz (225ml) of water, the lemon juice and black pepper.

Cover and turn the heat down low to simmer for approx 25 minutes, or until the chicken is tender, stirring a couple of times.

That’s it!


Posted in Indian & Asian Cuisine, Poultry | 3 Comments

Recipe – Spinach with Onion, Chili and Ginger & a Mint and Cilantro Relish

This week’s blog will add some vibrant green to your repertoire of Indian dishes.

‘Spinach with Onion, Ginger and Chili’ is another versatile dish that I think would also go very well with grilled or BBQ’d salmon.

As with the dal recipe from last week, it freezes well despite the fact that it contains previously frozen leaf spinach.

I did tell you that these recipes would be easy and I wasn’t exaggerating!

All you’ll need to create the fabulous ‘Mint & Cilantro Relish’ (besides the ingredients) is a food processor.

Honestly, this relish is so delicious that I’m amazed I haven’t found anything exactly like it in any Indian restaurant and it would also go really well with grilled or roast lamb.

Traditionally, Indian dishes containing yogurt call for the whole milk variety – I’ve made this relish with fat free Greek yogurt – also good but creates a much thicker result. I’d stay away from the regular fat free stuff – too watery.

By using just a few Indian dishes to spice up your regular fare you could become a master of ‘fusion’ cuisine.

SPINACH with ONION, GINGER & CHILI (Mughlai saag)

(Serves 4)

Ingredients:

2 lbs (1kg) of frozen leaf spinach, thawed and drained

4 tablespoons of vegetable oil such as grapeseed, canola or sunflower – or ghee (clarified butter, available from Indian supermarkets)

4 oz (110g) of onion, peeled and very thinly sliced

½ – 1 fresh green chili, seeded and chopped

1 teaspoon of grated fresh ginger

½ – 1 teaspoon of salt, to taste

½ teaspoon of sugar

¼ teaspoon of garam masala

Action:

Heat the oil (or ghee) in a pan over medium heat. When hot, add the onions and stir for a few minutes until softened.

Add the drained spinach, chili, ginger, salt and sugar. Continue to stir and cook for another 5 minutes then add 4 fl oz (125ml) of water; bring to a simmer, cover with a tight fitting lid, turn the heat down to low and cook for 10 more minutes.

Uncover and crank up the heat to evaporate any excess liquid.

Just before serving, sprinkle the garam masala over the spinach and stir to combine thoroughly. This freezes well.

And now for the most wonderful relish….

MINT & CILANTRO (Coriander) RELISH (Pudina-dhaniya ki chutney)

Blog, mint cilantro relish Indian 016Ingredients:

2 tablespoons of chopped fresh mint leaves

½ oz (15g) of chopped fresh cilantro (coriander leaves), including any small tender stalks

1 fresh green chili, seeded and chopped

1 small garlic clove, peeled and chopped

1 teaspoon of freshly grated ginger

½ teaspoon of salt or to taste

1 teaspoon of sugar

2 tablespoons of freshly squeezed lemon juice

4 oz (125g) of plain whole milk yogurt, or Greek style low fat/fat free

1 oz (25g) of ground almonds

Action:

Put everything in a food processor and pulse until smooth. Transfer to a serving bowl and chill for at least 2 hours to allow all the flavors to develop. This will be fine kept covered in the fridge for a few days. Not suitable for freezing.

Posted in Indian & Asian Cuisine, Made in Under 30 mins, Vegetables / Vegetarian | 3 Comments

Recipe – Chana Dal & Aromatic Yellow Rice

To continue with the Indian theme, here are two staples that make a meal all on their own but may be served separately.

Chana dal is my all-time favorite dal recipe and I’ve tried many versions. Chana dal (dried yellow split peas) creates a meaty, subtly-sweet dal. The end result is substantial and quite thick – you can dilute it with water, organic chicken or vegetable broth to make a fabulous soup or a slightly thinner dal if you prefer. It freezes brilliantly.

The yellow aromatic rice recipe is wonderful – the brilliant yellow color comes from the addition of turmeric and the rice is fragrantly spiced with cloves, cinnamon and bay leaves.

This is a great all-round classic rice dish and would also go very well with a baked ham or roast chicken; it’s certainly a lot more interesting than plain rice. It’s unsuitable for freezing because the rice grains become brittle.

I only ever use basmati rice when cooking Indian food as it has light, separate grains and a delicate nutty fragrance – and because it’s harvested at the base of the Himalayas, it’s the only option for me. You can use any long grain white rice but trust me, basmati is best.

If you have a rice cooker, simply add everything except the butter and let the machine do its magic. Fluff with a fork and add the butter when its done.

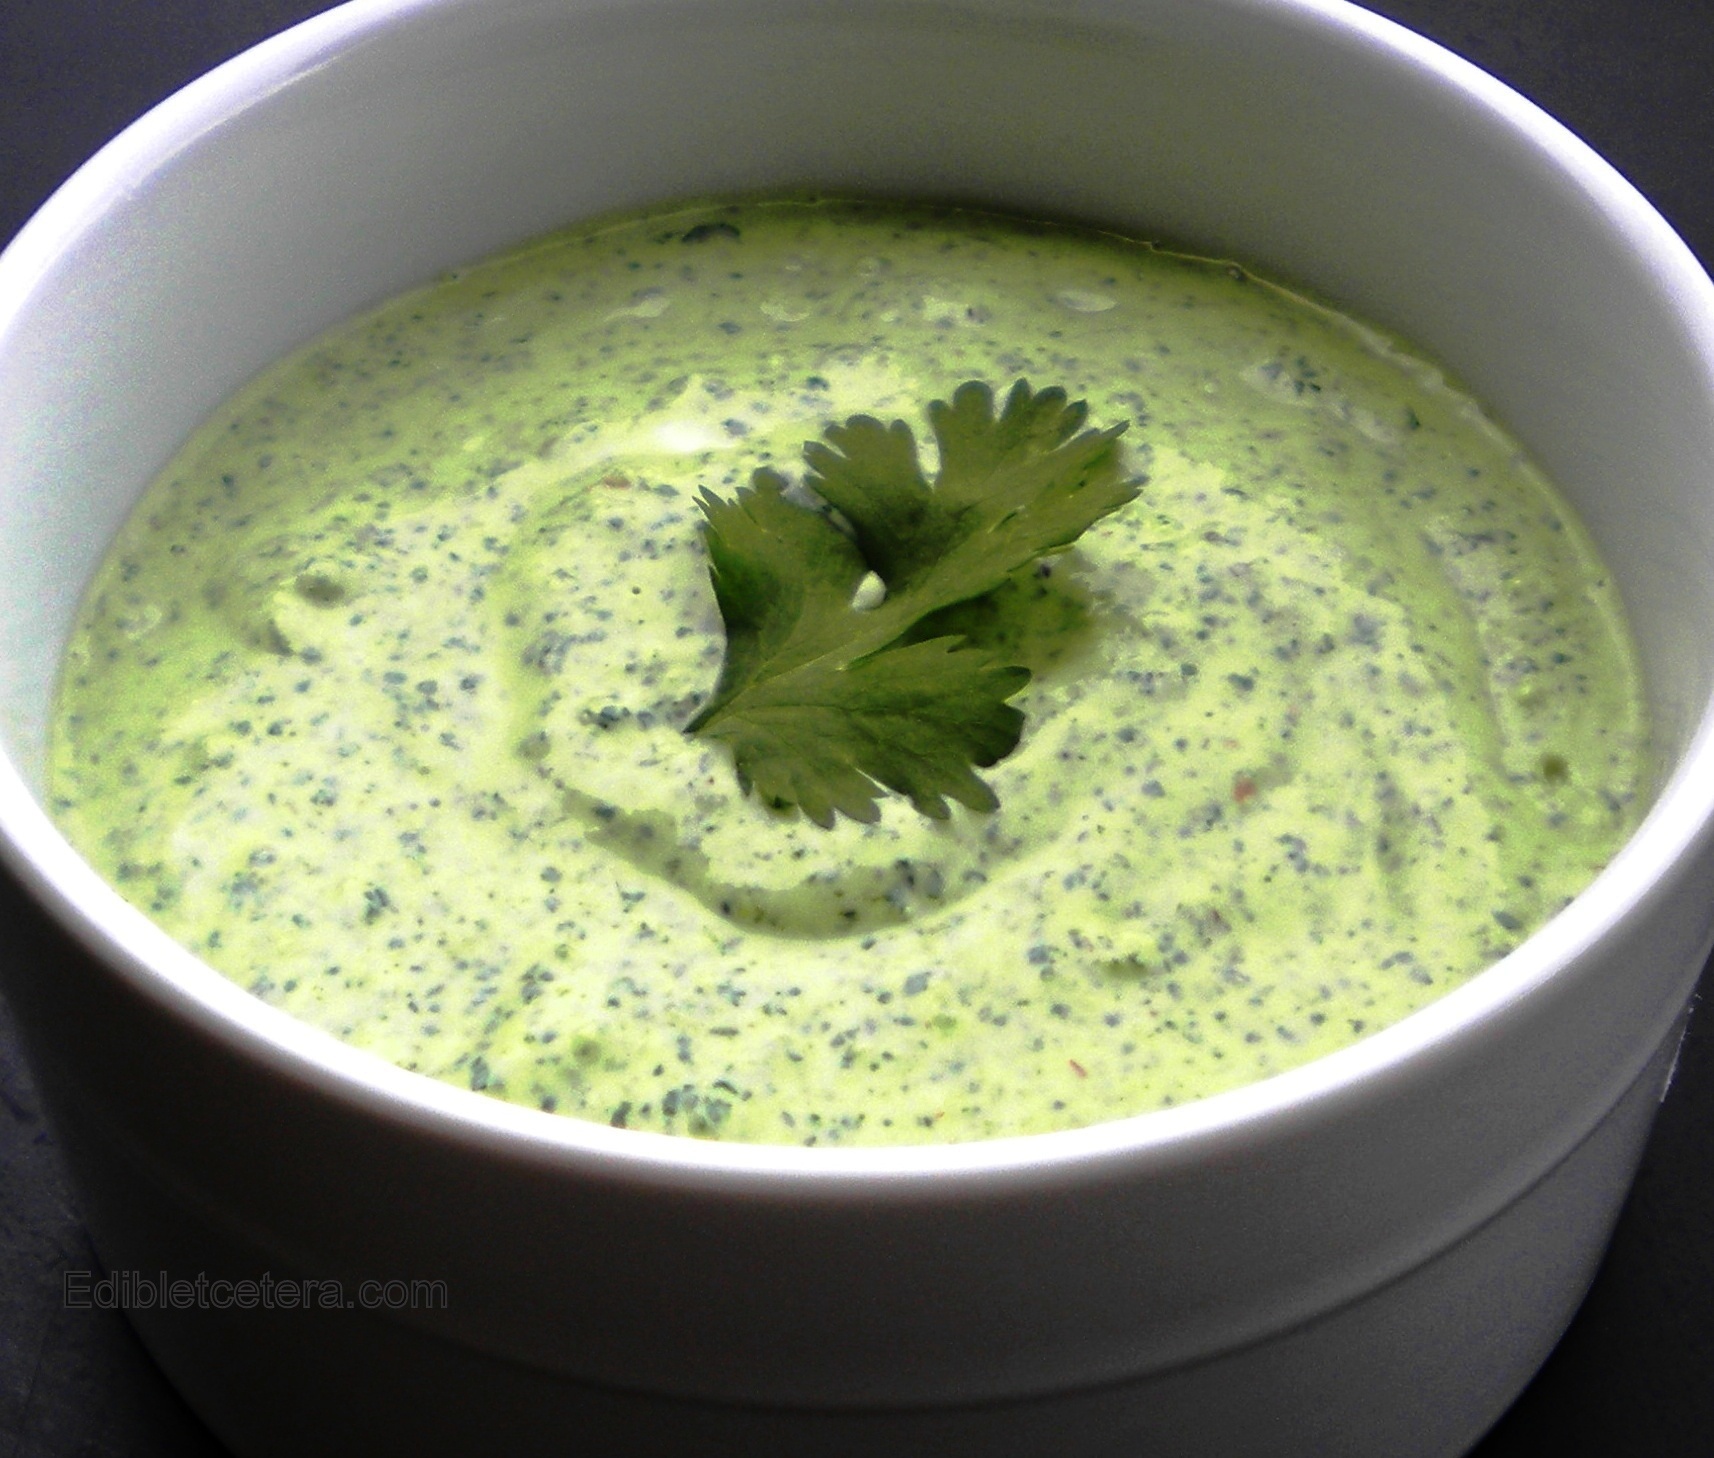
Next week’s blog will have a recipe for Saag (spinach with onion, ginger and chili) and a totally wonderful fresh mint and cilantro/coriander relish.

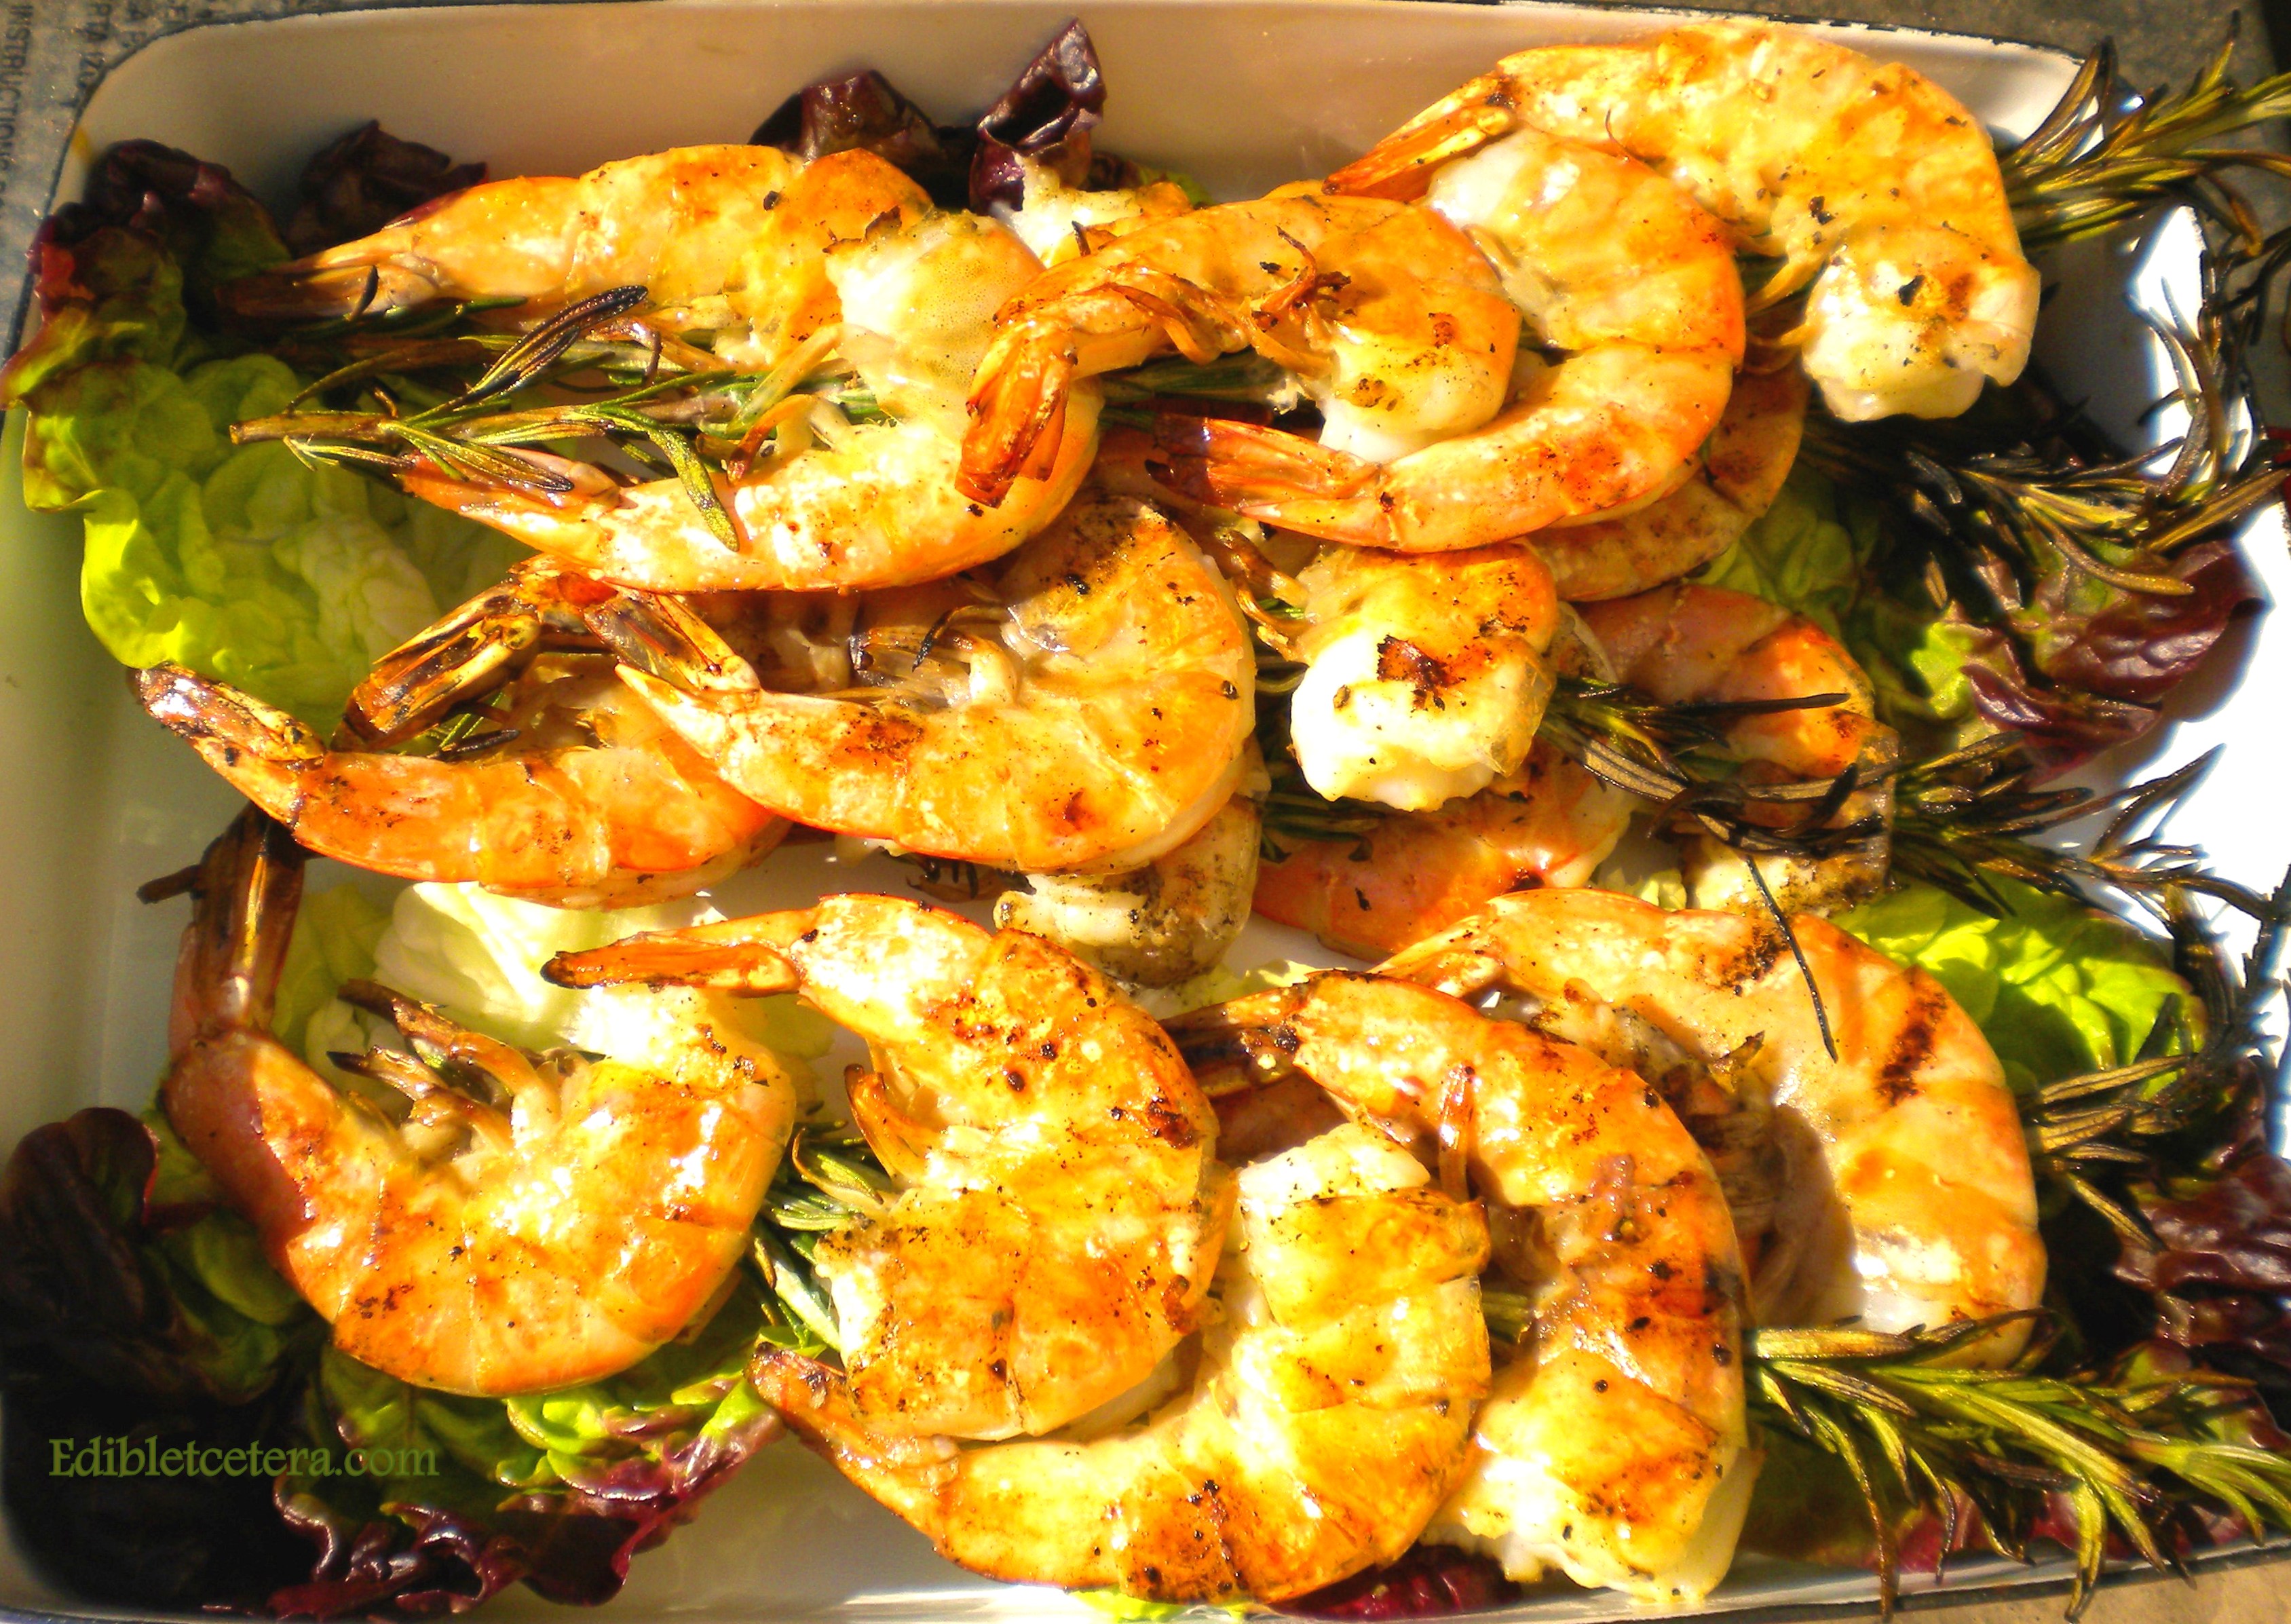
The following week I’ll post a recipe for chicken in a sweet red pepper sauce with almonds and ginger and by then you’ll have everything you’ll need to serve a fabulous authentic Indian meal that looks like this…..

If you can’t find spices such as garam masala, which is a combination of various ground spices and is generally used to ‘finish’ a dish…and you don’t have access to an Asian supermarket or Wholefoods, you can order Indian spices online from here:

Home

CHANA DAL

(Serves 4-6)

Ingredients:

8 oz (225g) of dried yellow split peas, picked over, washed and drained

2 pints (1.15 liters) of water

½ teaspoon of ground turmeric

2 thin slices of fresh ginger – unpeeled

¾-1 teaspoon of salt, or to taste

¼ teaspoon of garam masala

3 tablespoons of vegetable oil (I prefer grapeseed oil, canola oil, sunflower oil or peanut oil – avoid using olive oil in Indian cooking. You can also use ghee which is clarified butter; available from Indian supermarkets)

½ teaspoon of whole cumin seeds

2 fat cloves of garlic, peeled and finely minced

¼ teaspoon of cayenne (or more, according to how spicy you want the dal)

Action:

Put the yellow split peas and water in a heavy pan with a lid. Bring to a boil uncovered and skim off any scum on the surface with a slotted spoon.

Add the turmeric and ginger. Cover the pan leaving the lid slightly ajar and turn the heat down to very low. Simmer for 1.5 hours and during the last 30 minutes, stir frequently to prevent sticking.

Add the salt and garam masala and stir well. If you think its too thick and the peas aren’t completely soft yet, add a little more water and continue to simmer, stirring frequently until the dal is soft.

Meanwhile, heat the oil (or ghee) in a heavy pan over medium heat. When the oil is hot, add the cumin seeds followed by the garlic. Stir until the garlic is golden then add the cayenne. Turn off the heat and immediately pour everything onto the dal in the pan. Stir to mix thoroughly. Check the salt and dilute with more water or broth if you prefer a runnier dal. It’s excellent right away but even better on day two.

AROMATIC YELLOW RICE (Peelay chaaval)

(Serves 6)

Ingredients:

Basmati rice measuring to 15 fl oz (425ml) in a measuring jug

1 pint (570ml) of water

1 ¼ teaspoons of salt

¾ teaspoon of turmeric

4 whole cloves

2 inch stick of cinnamon

3 large bay leaves

3 tablespoons of unsalted butter, cut into small pieces

Action:

Note: some prepackaged basmati rice is ready-washed, in which case you won’t need to rinse and soak the rice first – I buy bulk rice from India that needs the starch rinsed off the grains…in which case, do the following: rinse the rice under running water in a strainer for one minute and then put it in a bowl, covered with 2 pints (1.25 liters) of water. Let it soak for 30 minutes then drain thoroughly.

Combine the drained rice, 1 pint (570ml) of water, salt, cinnamon, cloves and bay leaves in a heavy pan. Bring to a boil. Cover with a tight fitting lid and turn the heat to very, very low. Allow to cook for 25 minutes. Turn off the heat and leave completely undisturbed for another 10 minutes. Do NOT lift the lid to take a look as it hasn’t finished cooking.

After 10 minutes, remove the lid and add the pieces of butter – fluff everything gently together with a fork. Remove the whole spices before serving.

(Recipes courtesy of Madhur Jaffrey )

Posted in Indian & Asian Cuisine, Vegan, Vegetables / Vegetarian | 3 Comments

Recipe: Indian Spiced Green Pea Soup

Anyone who’s been fortunate to have traveled through India or has eaten at some of the finer Indian restaurants in the UK and New York will know that Indian cuisine is remarkable for its vibrant color and wonderfully aromatic spices. A common misconception is that all Indian food is fierily hot; this couldn’t be further from the truth and you’ll find supermarket ‘curry powder’ is never used.

I’ve been cooking authentic Indian food for decades and because many dishes take considerable preparation, I usually start the process a week ahead. Most dishes (with the exception of rice and the fresh relishes) are enhanced by spending 2-3 days in the fridge to allow the flavors to develop – and even more so after a stint in the freezer, as that really intensifies the spices and aromatics.

However, there are some very easy dishes that are totally delicious and authentically Indian, so for starters here’s one of my favorite Indian soup recipes; I like to serve it to large groups as an appetizer in small coffee cups; it also happens to be wonderful by the bowlful. *Vegetarians can replace the chicken broth with a good quality vegetable variety.

Just remember that if you make it two or three days ahead it will taste even better and it freezes well, before the addition of half and half or thin cream.

Over the next few weeks I’ll be posting several easy-to-prepare, authentic dishes that will create a complete Indian feast when combined; each dish can either be eaten alone or will go very well with western foods.

I was incentivized after a recent visit to our one and only local Indian restaurant.
Sadly, and despite their fine tandoor oven that produces excellent naan bread, everything else arrived at the table resembling various shades of cow-pat. To make matters worse, we were subjected to a ‘live’ musician whose performance was so egregious, so execrable and so utterly intrusive that we wanted to shoot him and put him out of our misery; we settled for moving into the next room to finish our cowpats.

For the real deal, I promise everything will be easy to prepare and you’ll have a small but authentic repertoire of Indian food to impress your friends with.

Vegetarians and meat eaters alike will be happy – you’ll need a food processor.

Finally, many people are confused by what to drink with Indian food so here is a list of suggestions and they should all be served well-chilled:

Champagne (sparkling wines pair really well); German Riesling; Gewürztraminer from the Alsace region of France; Lager beer; bottled India pale ale; Kingfisher ale (Indian) – and probably most surprisingly, Mateus Rose; a Portuguese slightly sparkling rose wine that’s generally looked down on in the UK and isn’t too easy to come by over here. It really does pair brilliantly with Indian food.

blog-indian-spiced-green-pea-soup-0011

INDIAN SPICED GREEN PEA SOUP

(Serves 6)

Ingredients:

4 oz (110g) of potatoes, peeled and chopped

3 oz (75g) of onion, peeled and coarsely chopped

2 pints (1.25ltr) of chicken or vegetable broth

1 inch (22.5cm) cube of peeled fresh ginger

½ teaspoon of ground coriander seed

2 teaspoons of ground cumin

5 tablespoons of chopped fresh cilantro/coriander

½ green chili (Serrano – hot, or jalapeno – not quite as hot; adjust to taste)

10 oz (275g) of frozen peas, thawed

½ teaspoon of sea salt, or to taste

1 tablespoon of fresh lemon juice

½ teaspoon of *dry roasted cumin seeds

¼ pt (150ml) of thin cream or half and half

Action:

In a heavy saucepan, combine the chicken stock, chopped onion, potato, ginger, ground coriander and cumin. Bring to a boil then reduce the heat and simmer for approx 20 mins or until the potatoes are tender.

Discard the piece of ginger. Add everything else except the cream/half and half. Bring to a boil and reduce the heat to a simmer for about 3 minutes. Cool slightly.

Puree the soup in a blender until smooth. You can freeze it at this point, otherwise transfer to another saucepan and add the cream/half and half and bring slowly to a simmer.

To serve, add a teaspoon of cream or perhaps some plain yoghurt and a sprinkle of roasted cumin seeds.

*To dry roast cumin seeds; heat a heavy skillet until hot; add the cumin seeds and toss around for a few minutes until fragrant and they’ve turned a darker brown; dry roasting cumin seeds really intensifies their flavor.

(A Madhur Jaffrey recipe)

Posted in Indian & Asian Cuisine, Soups, Vegetables / Vegetarian | 2 Comments

Recipe – Polenta Almond Pudding Cake with Berries & Lemon

It was so summery recently that I baked this sunshiny dessert – my friend managed to eat three servings during an unexpected hailstorm, which goes to prove that this is delicious regardless of the weather; I hope you’ll agree.

There’s no flour in this recipe – polenta and ground almonds create a moist cake with a lovely texture and the addition of a sticky lemon syrup and berries (blueberries, blackberries, raspberries or any combination thereof), means that this is more of a pudding than a cake and you’ll definitely need a fork and spoon to eat it with.

I serve it with extra fresh berries, with or without some plain Greek yogurt, creme  fraiche or whipped cream on the side.

BLOG polenta almond berry cake 001

POLENTA ALMOND CAKE with BERRIES and LEMON

(Makes 14-16 squares)

Ingredients:

6 oz (175g) of butter at room temp

8 oz (225g) of organic golden superfine/caster sugar

3 eggs, lightly beaten

5.25 oz (150g) of organic polenta

4 oz (100g) of ground almonds/almond meal

1 teaspoon of pure vanilla extract

2 teaspoons of baking powder

14 oz (400g) or raspberries

11 oz (300g) of blackberries, blueberries or both

Finely shredded zest of 1 lemon and the juice of half

Action:

Preheat the oven to 350F (180C)

Line a 9 inch (24cm) square shallow cake pan with baking parchment.

Cream the butter with 4 oz (175g) of the sugar until it’s pale and fluffy. Slowly add the eggs and polenta, beating well until thoroughly combined.

Fold in the ground almonds and baking powder – combine well then add the vanilla and lemon zest.

Using a large metal spoon, carefully fold in half of the berries (set aside the other half to serve with the cake).

Bake for 35-45 minutes or until golden and a skewer inserted in the middle comes out clean.

Meanwhile make the lemon syrup:

In a small saucepan, bring the juice of half a lemon and the remaining 2 oz (50g) of sugar to a boil and simmer for a couple of minutes until it’s syrupy.

Once the cake is done, leave it in the baking pan and immediately pierce it all over with a small toothpick or skewer and pour the warm lemon syrup all over.

Cool the cake in the pan – invert, cut into squares, dust with some powdered sugar and serve with berries on the side and some optional whipped cream or Greek-style yoghurt.

My friend Donna and I ate cake and drank a bottle of Costco Champagne (yes, Costco have their own label French champagne that’s insanely inexpensive and very good) – and my wine-expert friend Maggie, who manages the Willits Wine & Liquor store in Basalt, recommends a lovely Italian organic Prosecco produced by Mionetto, that’s around the same price – both pair very well with this dessert and both go down very well on their own…. so get partying!

Posted in Desserts, Gluten Free Desserts | 1 Comment

Recipe: Pasta with Salmon, Asparagus and Fresh Herbs

Here’s a lovely spring/summery dish you can whip up in less than 20 minutes.

It may not be summer quite yet but there are a few warmer days here and there and this recipe will have you feeling that it’s just around the corner.

Use wild salmon rather than the farmed, fake-colored variety if you can find it and go for organic ingredients where possible.

BLOG pasta with salmon, asparagus, mint and pine nuts 010PASTA WITH SALMON, ASPARAGUS & FRESH HERBS

(Serves 4)

Ingredients:

1 lb (450g) pasta – such as penne, rotini, etc

1 tablespoon of extra-v olive oil

1 lb (450g) of asparagus, trimmed and quartered or a large fennel bulb, trimmed and sliced

1.25 lbs (600g) of wild salmon fillets, cubed

8 fl oz (230ml) of dry white wine

7 oz (200g) of crème fraiche – low fat if you prefer

1 oz (28g) of fresh mint, chopped

1 oz (28g) of fresh parsley, chopped

2 oz (56g) of pine kernels, lightly toasted

Sea salt, freshly ground black pepper

Action:

Cook the pasta according to instructions

Heat the oil in skillet – add the asparagus or fennel – sauté for a few minutes until softened and starting to brown – add the salmon pieces and cook 2-3 minutes until lightly colored.

Add the wine and cook gently for 2-3 mins until reduced by half then add the crème fraiche, mint and parsley; warm through and season with sea salt and black pepper.

Tip the cooked, drained pasta into the skillet and gently combine everything.

Sprinkle with pine kernels to serve.


Posted in Fish & Seafood, Made in Under 30 mins, Pasta | 2 Comments