Recipe – Elk Chili

It’s a good job I have friends who hunt because buying elk meat can be prohibitively expensive.

So with many thanks to my hunting friends, I have a generous supply of elk steak and burger meat in my freezer. Deliciously lean and not overly game-y tasting, it makes an excellent chili.

There are more chili recipes in existence than days of the year and some can be complicated. I prefer to keep things simple, using really good organic ingredients when possible.

Serving chili in a roasted acorn squash is always a great idea; first of all there’s less washing up and secondly, you get to eat the bowl which happens to be delicious. Of course you can just serve it in regular bowls over rice if you prefer and as for the topping, I don’t particularly like shredded American cheese but a good dollop of sour cream, topped with an avocado, cilantro, lime, chili and red onion salsa, fits the bill perfectly.

Use salsa from a jar if you’re pushed for time.

Elk Chili with Roasted Acorn Squash

Elk Chili with Roasted Acorn Squash

ELK CHILI

(serves 4-6)

Ingredients:

1 1/4lb (half a kilo approx.) of ground elk meat or lean beef

2 rashers of nitrate-free organic bacon (streaky)

I medium onion, finely chopped

2 fat cloves of garlic, minced

1 tablespoon of fresh oregano

1 teaspoon of ground dry-roasted cumin seeds

1 heaped tablespoon of tomato paste/puree

Two 14.5 oz (411g) cans of chopped tomatoes

One 14.5 oz (411g) can of chili beans

Chipotle hot sauce to taste

Sea salt & freshly ground black pepper

Optional – 2 or three acorn squash of equal size

Action:

In a deep sauté pan with a lid, cook the bacon until it’s crispy and all the fat has been released. Remove the bacon and add the minced onion and garlic to the bacon fat and continue to cook until the onion is soft. Add the ground elk meat and stir it about until browned then add everything else, starting with small amounts of hot sauce until you have the desired kick you want. Unless you fed it to your dog, you could crumble the cooked bacon and add that too.

Stir everything together thoroughly, bring it to a boil then reduce to a simmer and put the lid on. Let it cook for 1-2 hours, stirring occasionally adding a little water if it looks like it’s drying out.

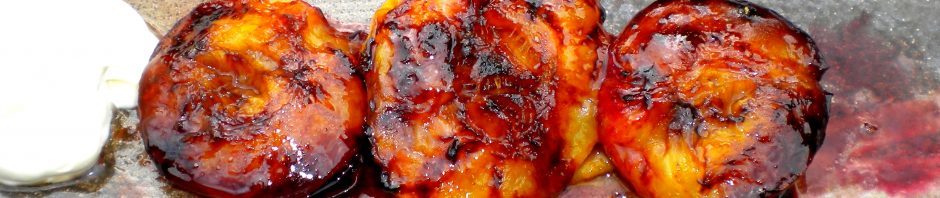
Meanwhile roast the acorn squash. Preheat the oven to 350F and cut each squash in half around the middle. Trim both ends a little so that they sit upright and scrape out the seeds. Brush the flesh with a little olive oil and season with sea salt and freshly ground black pepper.

Place cut side down on a baking tray and bake for about 40 minutes or until the flesh is soft.

To serve, divide the chili among the acorn squash ‘bowls’ and top with your favorite chili ‘fixins’.

Posted in Meat | 2 Comments

Recipe – Persimmon & Ginger Pudding Cake

This luscious dessert contains rather a lot of fruit puree and ground almonds (if using) and whereas it isn’t the prettiest pudding on the planet and definitely needs as bit of tarting up before you serve it, it really is wonderful.

Ripe Fuyu persimmons have a sweet, rich, almost date-like consistency and after a couple of pulses in a food processor, they make a lovely purée that’s good enough to eat alone or over ice cream, no sweetener needed.

I’ve adapted this recipe from one I found in Saveur. I halved their recommended amount of sugar, replaced the flour with ground almonds and added crystallized ginger.

The result was a deliciously moist, sticky mess that also went down very well with my morning coffee.

Persimmon Ginger Pudding Cake

Persimmon Ginger Pudding Cake

PERSIMMON & GINGER PUDDING CAKE

(Serves 8-10)

Ingredients

2 cups (480 ml measure) of pulp from approx 4 firm-ripe Fuyu persimmons

1 cup (240 ml measure) of sugar

2 eggs,  lightly beaten

1 12 cups (360 ml) of buttermilk

1 teaspoon of baking soda

1 12 cups (360 ml measure) of all purpose flour (or ground almonds for a stickier result)

1 teaspoon of baking powder

12 teaspoon of ground cinnamon

1/3 cup (80 ml measure) of finely chopped crystallized stem ginger

A pinch of salt

14 cup (60 ml) of heavy cream

4 tablespoons of unsalted butter, melted

1/3 cup (80 ml measure) of finely chopped crystallized ginger

Powdered sugar to serve

Action:

Preheat the oven to 350F (180C). Carefully cut out the stalks then peel the persimmons with a potato peeler and cut them into chunks. Put the fruit  in a food processor and pulse until you have a thick purée. Transfer this to a bowl, add the sugar and stir until well blended then beat in the eggs.

In a separate small bowl, whisk the baking soda into the buttermilk and add this to the fruit mixture, folding everything together to combine well.

In another bowl, sift the flour, baking powder, cinnamon, and salt together. Gradually add to the fruit pulp, stirring until well combined then add the cream and chopped crystallized ginger. Mix thoroughly.

Brush a 9” x 13” (23 x 33 cm) baking pan with some of the melted butter and stir the rest into the fruit mixture.

Pour the batter into the prepared pan and bake for approx 1 hour or until it’s a dark golden brown on top and a toothpick inserted into the center comes out clean. Cool in the pan on a rack.

To serve, dust with powdered sugar and add a dollop of crème fraîche along with a few slices of ripe, peeled persimmon.


Posted in Desserts, Gluten Free Desserts | 9 Comments

Recipe – Pasta with Cauliflower & Stilton

If you like cauliflower cheese you will absolutely love this dish. It tastes luxurious and makes a fabulous vegetarian main course.

Although it isn’t essential flavor-wise, golden or purple cauliflower will add a colorful dimension if you can find them; otherwise this will be a creamy-looking dish, studded with small flecks of green.

Stilton, that ‘King of English cheeses’ is the best choice but failing that, go for Roquefort or Gorgonzola.

A word of warning if you use purple cauliflower – the water you cook it in will turn blue and unless you want blue-grey pasta, throw that water out and start over.  I prefer to use pappardelle egg noodles with this recipe; they’re wonderfully silky but you can use any pasta.

You could also make this as a baked pasta dish; just cook up some penne or similar, fold the pasta into the sauce with the cauliflower, transfer everything to a buttered, shallow ovenproof dish and top it with lots of grated Parmesan before sticking it in a hot oven for 15 minutes, or until the cheese turns golden.

You might also enjoy  cauliflower & Stilton soup with chili croutons – another winter dinner-party winner that’s impressive and easy to make.

Pappardelle with Purple Cauliflower & Stilton

Pappardelle with Purple Cauliflower & Stilton

PAPPARDELLE with PURPLE CAULIFLOWER & STILTON

(Serves 4)

Ingredients –

8 oz (200g) of smallish cauliflower florets of equal size

1 oz (20g) of unsalted butter

6 oz (150g) of Stilton, crumbed

4 tablespoons of crème fraîche

3 tablespoons of olive oil

1 large garlic clove, slightly flattened

1 tablespoons of fresh thyme leaves, stripped from the stalk

11 oz (300g) of pappardelle noodles or other pasta

Freshly grated Parmigiano Reggiano to serve

Action:

Drop the cauli florets in a large pan of boiling salted water and simmer for 5 minutes. If using white or golden cauliflower, remove it with a slotted spoon and drain. You’ll use that water to cook the pasta in (unless it’s blue water from a *blue cauli – see above).

Melt the butter with the Stilton and crème fraîche in a small saucepan over a low heat stirring frequently but don’t let it boil. Once the cheese has melted, take the pan off the heat and add the thyme leaves.

Heat the olive oil in a deep sauté pan and cook the whole garlic for a few minutes until golden then discard it. Add the drained cauliflower to the oil in the pan and cook, stirring occasionally for about 5 minutes or until it starts to turn golden in patches.

Meanwhile, cook the pasta in the reserved cauliflower water until al dente, the drain it quickly and add it to the cauliflower, followed by the Stilton sauce. Fold everything together.

Pile into warmed individual pasta bowls and sprinkle grated Parmesan over the top with extra to pass around.


13926-christmas-cocktails-1680x1050-holiday-wallpaper


Posted in Made in Under 30 mins, Pasta, Vegetables / Vegetarian | 2 Comments

Recipe – Pears in a Chocolate Sauce

Pears and chocolate were meant to go together and this favorite childhood dessert fills me with nostalgic longing. It’s also really easy to make.

Pears have always been one of my favorite fall-winter fruits, probably because the pear tree in our garden had a shorter fruiting season than the Bramley apple tree which provided an abundance of fruit every year, causing us kids to complain “Oh, not apple crumble again?”

With our pears it was always about timing; we’d try and gather the juicy golden fruit before the wasps got to them. As a result, I learned how to deal with wasps without getting stung which comes in handy from time to time.

Mum usually made a thick chocolate custard to pour over the poached pears – a comforting treat for a small child. I’ve upped the sophistication level here and this simple chocolate sauce recipe is not only elegant and intensely chocolatey, it’s also versatile and can be eaten hot or cold.

I used a ginger liqueur in this version because pears go particularly well with ginger and chocolate – but you could use Amaretto, Grand Marnier, Kahlua, etc., depending on what you intend to pour the sauce over (cake, ice cream and so-on).

A scattering of chopped up crystallized ginger or stem ginger in syrup over the pears just before serving would also be lovely.

This sauce will keep, covered in the fridge for about a week and it solidifies when chilled. Just heat it gently to return it to a runny state – a brief spurt in the microwave works. It has a thicker pouring consistency when served at room temperature.

You can also poach the pears the day before. Just leave them to cool in their poaching liquid then cover and transfer them to the fridge.

This makes a lovely dinner party dessert, especially when served in pretty individual dishes and I promise it will generate lots of ‘Oohs’ and ‘Aahs’.

If you love pears you might also like to try – Spiced Pear Tarte Tatin, Warm Spiced Pears with Figs & Almonds or  Pears Poached in Red Wine with Juniper.

Poached Pears with a Chocolate Sauce

Poached Pears with a Chocolate Sauce

POACHED PEARS with a CHOCOLATE GINGER SAUCE

Served 6)

Ingredients:

1 pint (600ml) of water

3 oz (75g) of fine sugar

The pared rind & juice of 1 lemon

6 ripe but firm pears (Bartlett or William)

For the chocolate sauce:

3.5 oz (100g) of semi-sweet chocolate chips

1 oz (25g) of unsalted butter

5 tablespoons of water

1 tablespoon of ginger liqueur such as Domaine de Canton (or Cognac, Amaretto, etc)

Action:

Start with the pears –

Carefully remove the zest from the lemon and put it in a saucepan (big enough to hold the pears) along with the water, lemon juice and sugar – bring it to a boil and reduce to a simmer once the sugar has dissolved. Save half a lemon, see below.

Leaving the stalks intact, peel the whole pears, rub them with the lemon half and place them in the pan with the syrup. Simmer, covered for about 10 minutes, turning them around once. As soon as the pears are tender, take the pan off the heat and allow them to cool in the syrup.

Once they’re cool, carefully scoop out the core from the base using a small spoon. You can discard the syrup and transfer the pears to a bowl, keeping them upright if possible. Cover and chill them  in the fridge for 1-2 hrs or overnight.

To make the chocolate sauce, put the chocolate, butter and water in a bowl set over a pan of barely simmering water, making sure the bottom of the bowl doesn’t come into contact with the water. Stir until the chocolate melts and everything combines to make a glossy sauce, then stir in the liqueur.  Transfer the sauce to a small sauce-boat/jug and serve it warm or at room temperature.

To serve, create a small puddle of chocolate sauce in the bottom of each individual serving dish then stand a poached pear in the middle. Carefully pour a couple of spoonfuls of sauce over the pear.


Posted in Desserts, Gluten Free Desserts | 2 Comments

Recipe: Pappardelle with Chanterelles & Toasted Hazelnuts

Chanterelles are delicate and rather elusive – the only time I ever gathered my own was one morning back in the UK, when I looked out over the lawn from the bedroom window of our new home and saw what I thought was a vast patch of golden wildflowers that had sprung up overnight.

Imagine my delight when I realized that our lawn was carpeted with chanterelles – enough for a huge feast. They made their way into several wild mushroom & prosciutto lasagnas that stayed in my freezer until the next big party. The lasagna was declared “ambrosial” and I was asked many times to make it again but sadly, those chanterelles never reappeared and frankly, I resented paying £30.00 a pound for them in Harrods.

Fresh Chanterelles

Fresh Chanterelles

But that was long ago, so I was delighted when I came across cartons of fresh Oregon chanterelles in Costco the other day – not quite as thrilling as finding your own but still an absolute treat at an astonishing $9.99 lb.

I wanted a simple recipe that would allow the mushrooms to shine rather than disappear in a creamy sauce.  I’ve adapted this from a recipe I found in Food & Wine that originally called for fazzoletti (pasta ‘handkerchiefs’), home-made with burnt faro. It sounded amazing but I’m trying to keep things fast as well as fabulous here, so I’ve opted for store-bought silky egg noodles (pappardelle), my favorite quick-cooking pasta.

The toasted hazelnuts add a perfect woodsy crunch and the end result has just enough bite – neither overwhelming but definitely not bland.

The original recipe called for sherry vinegar – I’d run out of that so used a Cava Rosé vinegar instead and the end result was quite wonderful!

Note:

  1.  If you have access to  Trader Joe’s , buy their ready-roasted, skinned hazelnuts; a great time-saver for all sorts of recipes that require skinned, toasted hazelnuts.
  2. I store nuts in the fridge; they’ll keep for ages and it stops them from becoming rancid.
Pappardelle with Chanterelles & Hazelnuts

Pappardelle with Chanterelles & Hazelnuts

 PAPPARDELLE with CHANTERELLES & TOASTED HAZELNUTS

(Serves 4-6)

Ingredients:

1/2 cup (120ml measure) of hazelnuts, toasted and skinned

6 tablespoons of unsalted butter

1 lb (o.45 -0.5 kilo) of fresh chanterelles, wiped clean with a damp cloth then thickly sliced

Sea salt & freshly ground black pepper

1 large shallot, chopped finely

1 tablespoon of fresh thyme leaves, pulled from the stalk

A pinch of red pepper chili flakes

2 tablespoons of sherry or really good wine vinegar

1 cup of chicken stock (vegetarians can use vegetable stock)

3/4 lb (0.35 kilo) of pappardelle or other egg pasta noodles

1/4 cup (60 ml measure) of finely snipped fresh chives

Action:

If you’re toasting your own hazelnuts, heat the oven to 375F (190C), the spread the nuts on a tray and roast them for 12 minutes until fragrant. Transfer them to a wire mesh strainer and roll around until all the skins flake off, or rub the skins off in a clean dish towel. Chop them coarsely and set aside.

Cook 4 tablespoons of the butter in a wide deep sauté pan until it’s lightly browned.

Add the chanterelles and season with salt and freshly ground black pepper. Cook over a high heat, stirring occasionally until the liquid has evaporated and the mushrooms are golden (8-10 minutes).

Add the shallot, fresh thyme and red pepper flakes and cook for another 5 minutes over a moderately high heat, stirring from time to time.  Add the vinegar and cook until it evaporates then add the stock; reduce the heat and simmer until the liquid has reduced by about half. Check the seasoning and add more salt and black pepper if needed.

Meanwhile, bring a large pot of salted water to the boil and cook the pasta according to instruction until just al dente. Drain quickly, add to the mushroom mixture along with the remaining 2 tablespoons of butter and toss around for a couple of minutes to thoroughly combine everything.

Just before serving, fold in the snipped chives then spoon the pasta into warmed individual bowls – finish each with a garnish of chopped toasted hazelnuts.

Posted in Pasta, Vegetables / Vegetarian | 2 Comments

Cranberry-Pear Fruit Jellies (Pâte de Fruits)

‘Pâte de Fruits’ (fruit paste) is a classic French confection. There are many versions out there and some are a bit laborious, requiring a candy thermometer.

This Martha Stewart recipe is drop dead easy and takes no more than 15 minutes to make. However, I’ve adapted it because I discovered that if the fruit jellies are rolled in sugar before they’ve had time to dry out properly, the sugar melts and you end up with a rather sticky mess.

On that basis, I recommend making these 2-3 days before you want eat them (or package them as gifts). This also allows the fruit flavors to fully develop.

The end result – bright, jewel-colored little sweets that taste intensely fruity.

You can make these with any fruit combination such as blackberries, apples, citrus zest, raspberries, blackcurrants, apricots and so-on. The most important thing to remember is to use 100% pure pectin (not ‘Certo’ or similar) to achieve the quick setting action required here.

I use Pomona’s Universal Pectin because it jells with any amount of sweetener, which means you can use a sugar substitute or reduce the amount of sugar when making these with sweeter types of fruit – or perhaps you prefer a tart-tasting jelly.

You’ll need a food processor and an 8 x 12 inch (20 x 30 cm) baking pan.

Cranberry & Pear 'Pâte de Fruit'

Cranberry & Pear ‘Pâte de Fruit’

CRANBERRY & PEAR JELLIES (Pâte de Fruit)

(Makes 40-50 jellies)

Ingredients:

2 lbs (0.9k) of ripe pears, peeled, cored and cut into chunks

1.5 cups (360ml measure) of fresh or frozen cranberries

2 cups (480ml measure) of sugar, divided

1/4 cup (60ml measure) – or 1 envelope of Pomona’s Universal Pectin

A splash of fresh orange juice

Extra sugar for rolling

Action:

Line the baking pan with parchment.

Put the pears and cranberries in a food processor and pulse,  scraping down the sides from time to time, until you have a smooth purée.

Transfer this to a heavy based pan and add 1 & 3/4 cups (420ml measure) of the sugar and a splash of orange juice. Bring to a rapid boil and continue to boil, stirring for approx 3 minutes.

Combine the remaining sugar with the pectin and sprinkle this over the boiling fruit purée, whisking thoroughly while continuing to cook for one more minute.

Turn off the heat and immediately pour  the fruit into the prepared pan, smoothing it over if necessary.

Allow it to set and cool on a wire rack (I recommend overnight), uncovered.

Cranberry & Pear 'Pâte de Fruit'

Cranberry & Pear ‘Pâte de Fruit’

The next day, cut the ‘Pâte de Fruits’ into 1- 1.5 inch squares (3-4cm) with a sharp knife and transfer them to the wire rack to dry out for at least 8 hours, or overnight.

They’ll always be slightly sticky but once they’ve dried out, sprinkle some extra sugar on a plate and press the jellies into the sugar on all sides.

Whether you’re eating them yourself or making them as a gift, I recommend arranging/storing them in single layers separated by non-stick baking parchment, in an airtight container  – but do make sure they’re completely dry first.

Pear & Cranberry Pâte de Fruits

Pear & Cranberry Pâte de Fruits

Posted in Cookies & Edible Gifts, Desserts, Gluten Free Desserts, Made in Under 30 mins, Vegan | Leave a comment

Recipe – Cider-Braised Pork with Apples & Shallots

Pork with apple. A classic, centuries-old combination.

Where I live there’s a sad absence of roast pork the way I like it; leg or shoulder of pork enrobed with a crisp, light, mouthwateringly fragrant crackling that begs to be served with a spiced apple sauce – something we traditionally served on Boxing Day (December 26th), many years ago, back home.

Despite the absence of crackling, this is pretty much the next best thing and appeases my nostalgic longings by perfectly capturing all those flavors in a simple braised dish. The pork is wonderfully moist and tender and the apple really shines through.

I recommend serving it with mounds of fluffy mashed potato and something green on the side – I’d go for Brussels sprouts (perhaps leaving out the bacon in this instance).

It tastes even better the next day.

Pork Braised in Cider with Apples & Shallots

Pork Braised in Cider with Apples & Shallots

CIDER-BRAISED PORK with APPLE & SHALLOTS

(Serves 6)

Ingredients:

1 tablespoon of olive oil

8-10 shallots of equal size, peeled

7 oz (200g) of pancetta, chopped into about 1 inch (2-3cm) pieces

3 cloves of garlic, finely chopped

1.5 lbs (0.70 kilo) of pork sirloin or shoulder, cut into 2 inch (5cm) chunks

2 tablespoons of apple cider vinegar

2 tablespoons of all-purpose (plain) flour

9 fl oz (250ml) of hard cider (the alcoholic variety)

1 large apple such as Braeburn or Cox, left unpeeled, cored and cut into eight

1 tablespoon of juniper berries, lightly crushed

2 bay leaves

4 -5 fresh sage leaves, chopped

a sprig of fresh thyme

21 fl oz (600ml) of chicken or vegetable stock

Action:

Heat the olive oil in a wide, deep sauté pan with a lid and brown the whole shallots, turning them around. You want them to have little brown patches all over.

With a slotted spoon, transfer them to a large bowl. Now cook the pancetta until it’s crispy and brown and has released its fat. Add the garlic and continue to cook for a couple of minutes then transfer all of that with a slotted spoon to the same bowl, leaving the pancetta fat behind.

In a separate bowl, season the flour with sea salt and freshly ground black pepper then toss the cubed meat to coat thoroughly with flour.

Brown the chunks of pork on all sides in the pancetta fat then pour in the cider, giving it all a good stir. Let the cider simmer away until it’s reduced by about a half then add the shallots, pancetta and all the remaining ingredients – stir thoroughly and bring everything to a boil.

Put the lid on and reduce the heat to a simmer and allow it to cook for a couple of hours or until the meat is really tender.


Posted in Meat | 2 Comments

Recipe – Compote of Figs in a Lemon & Ginger Syrup

Like many people, I’m partial to eating ice cream all year round but serving it with fresh berries in winter doesn’t appeal much.

I’m also very fond of dried fruits, in particular figs. Figs have always tasted a bit Christmassy to me, probably because as a child growing up, Christmas was the only time we had those sticky, sugared, dried figs that came arranged snugly in an oblong box.

They were an absolute luxury to my 6 year old mind and today, I’m immediately drawn to any recipe containing figs, dried or fresh.

This simple compote is an old recipe and one of my favorites; the magical combination of flavors come together to create something that tastes much greater that the sum of it’s parts. Wintery and  Christmassy-tasting, it makes the perfect topping for good vanilla ice cream and cheesecake, or it could be used as a filling for some little flaky pastry thing.

Anyway, this only takes a few minutes to make but do allow it to macerate in the fridge overnight so that the flavors really develop.

This compote keeps well for several days, covered  in the fridge. Leave in the lemon zest, cinnamon stick and chunks of ginger until you’re ready to serve and bring it to room temperature first.

Compote of Figs in a Lemon & Ginger Syrup

Compote of Figs in a Lemon & Ginger Syrup

 COMPOTE OF DRIED FIGS with LEMON ZEST & FRESH GINGER

(Enough for 4-6 people as a topping for ice cream)

Ingredients:

9 oz (250g) of dried calimyrna or smyrna figs

One stick of cinnamon

2 long strips of pared lemon zest (no white pith) plus 1 tablespoon of lemon juice

A chunk of fresh ginger about 1 inch (2.5cm) long, peeled and quartered

1 oz (25g) of sugar

10 fl oz (275ml) of water

Action:

Snip off and discard the stalks then halve the figs.  Put them in a small saucepan with the cinnamon stick, ginger, lemon zest, lemon juice and the water.

Bring slowly to a boil then reduce the heat and simmer for 5-6 minutes.

Using a slotted spoon, remove the figs to a bowl, leaving the cinnamon, ginger and zest in the water then add the sugar, stirring well until the sugar dissolves. Bring it to a rapid boil and continue to boil until the liquid becomes syrupy and has reduced by about half.

Pour everything over the figs in the bowl and  allow it to cool, then cover and chill in the fridge overnight, or up to 4 days.

Bring the compote to room temperature and remove the zest and spices just before serving.

Posted in Gluten Free Desserts, Made in Under 30 mins | 2 Comments

Recipe – ‘Lapin Aux Pruneaux’ (Rabbit Braised in Red Wine With Prunes)

There’s no easy way to present this. I do my best to share recipes that will appeal to the whole gamut of peoples’ food preferences but I also realize that rabbit will only appeal to certain types of people such as hunters, squirrel-eating Southerners and carnivorous Europeans.

So I’m  offering an apology to anyone who would rather poke their eye out with a fork than eat rabbit. Just remember that the people referred to above  might feel the same way if served with tofu mousse.

As an aside, I was once presented with the challenge of getting someone to eat this dish and was told “Never in a million years will you get him to eat rabbit!” – so I creatively referred to it as ‘wild hare’. For some reason that worked and the aforementioned aversionist polished off two servings.

The original recipe for Rabbit in Red Wine with Prunes Moving on, this is a really delicious small game dish and I still use the original hand-typed, marinade-splattered recipe that was given to me 40 years ago. In this case it doesn’t technically count as game, because the oven-ready rabbit  I cooked here was farmed.

There are numerous versions of ‘Lapin aux Pruneaux’ – that’s French – and this has to be one of the simplest which appeals to my lazy chef’s heart.

I used a slow cooker but I’ve also made it many times in a heavy casserole (dutch oven) with a lid.

If you’re working with whole rather than sectioned rabbit, you’ll need a pair of poultry shears. It’s not too different from cutting up a chicken but rabbit is an unfamiliar shape, so try and keep the portions about the same size. You also need to start 24 hrs ahead to allow the rabbit to marinate.

Be prepared to impress and be impressed.

'Lapin aux Pruneaux'

‘Lapin aux Pruneaux’

 RABBIT BRAISED IN RED WINE WITH PRUNES (Lapin aux Pruneaux)

(Serves 4)

Ingredients:

One rabbit (cut into 4-6 portions)

3/4 pint (half a liter approx) of good red wine. I used a fruity Zinfandel

A few whole black peppercorns

A few juniper berries, lightly crushed

A good sprig of fresh thyme

2 bay leaves

1.5 oz (40g) of all purpose / plain flour

2.5 tablespoons of red wine vinegar

12 oz (340g) of ready-to-eat prunes

1 heaped tablespoon of redcurrant or elderflower jelly

2 oz (56 g) of butter

Action:

Put the rabbit portions in a large bowl and add everything else except for the prunes, butter and redcurrant jelly. Cover and chill overnight or up to 36 hrs.

If you aren’t using a slow cooker, preheat the oven to 325F (160C)

Remove the rabbit pieces, reserving the marinade – pat them dry.

Heat the butter in a heavy sauté pan and when it sizzles, add the rabbit pieces and brown them on both sides. With a slotted spoon, transfer them to a slow cooker or heavy casserole dish.

Add the flour to the butter in the sauté pan and stir well, creating a ‘roux’. Cook, stirring for a minute or so then whisk in the marinade (removing the peppercorns and juniper if you prefer) and continue to whisk over a medium low heat, until you have a smooth sauce. Pour this over the rabbit, stir in the prunes and put the lid on.

Turn the slow cooker setting  to ‘high’. Cook for 3 – 4 hours, or until the rabbit is tender.

Otherwise put it in the oven, covered for about 2 hrs, or until the rabbit is tender.

Note: keep some extra wine to hand. If it looks like the liquid  is reducing too much in either method above, just pour in some more. Sometimes these things can be a bit approximate but adding more wine is never a bad thing.

Just before serving, stir in the tablespoon of redcurrant jelly and finish with a sprinkle of chopped flat leaf parsley.

Any leftovers will taste even better the next day – just warm through gently.

I like to serve this with Duxelles mashed potatoes and perhaps some duck fat roasted parsnips.

Posted in Meat | 5 Comments

Recipe: Sausages Braised with Apples, Potatoes & Caramelized Onion

Here’s a great way of using the Onion Jam that you make in batches and keep in the freezer.

Sausages always make an affordable hearty supper, especially when baked in this way and there’s nothing nicer than a really good pork sausage paired with apple. Onion jam gives is a lovely sticky richness and the potatoes round it all off; perfect for fall or winter.

It’s important to use the very best quality ingredients. Steer clear of heavily processed, mass-produced sausages that are full of preservatives and god-knows-what.   Hand made sausages are best (Whole Foods make their own) – or find some local butcher who makes them using organic free range meat.

Turkey or chicken sausages will also work well and if you can get wild boar, duck, rabbit or another game-y type of sausages, even better!

Pork Sausages Braised With Apples, Thyme & Onion Jam

Pork Sausages Braised With Apples, Thyme & Onion Jam

SAUSAGES BRAISED with APPLES, POTATOES, ONION JAM & THYME

(Serves 4)

1-1/2 lbs (500-600g) of best quality pork sausages

1/2 cup (120ml measure) of onion jam

2 large apples such as Braeburn, cored (not peeled) and sliced into 6 wedges each

2 sprigs of fresh thyme

1 lb (500g) of unpeeled baby potatoes, sliced thickly

A tablespoon of olive oil

3/4 – 1 pint (300-500ml) of organic chicken stock

Freshly ground black pepper & sea salt to taste

Action:

Preheat the oven to 350F (180C)

On the stove-top, heat the oil in a deep sided roasting pan or ovenproof skillet and saute the potato slices until they start to brown.

Take off the heat and stir in the onion marmalade, followed by the apples, thyme, a good grind of black pepper and sea salt to taste. Add the sausages so that they’re all well combined then pour over the chicken stock. You want enough so that it almost covers everything.

Bake for 55-60 minutes until the sausages are fully cooked.

Serve with a green vegetable on the side.

Posted in Meat | Leave a comment