Recipe – S’Mores Parfait

I don’t image there’s anyone in the US who doesn’t know what S’Mores are but for everyone else, they’re a campfire treat consisting of a fat, toasted marshmallow, squished together with a square of milk chocolate between two graham cracker cookies (a sort of slightly inferior British digestive biscuit).

Campfire 'S'Mores' with organic dark chocolate

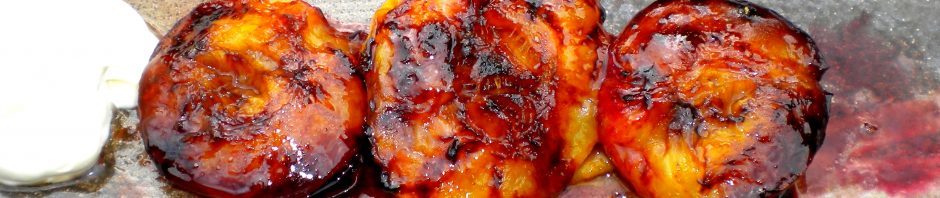
Campfire ‘S’Mores’ with organic dark chocolate

Traditionally, the chocolate used in S’Mores is a piece of Hershey’s, an American ‘chocolate’ candy that contains such minuscule amounts of actual chocolate, it doesn’t deserve the name. I’ll only eat the campfire version made with organic dark chocolate, preferably home made.

S’Mores are scrumptious and because I don’t see why we have to wait for warm summer nights and a campfire in order to enjoy them, I came up with a version that can be served in individual dessert bowls or ramekins. The ingredients are basically the same but I replaced the square of chocolate with a voluptuous chocolate  ganache, laced with a splash of Godiva chocolate liqueur. Dark rum is also good but this works perfectly without any alcohol if you’d rather not.

They can be assembled ahead up to the point of sticking them under the broiler/grill to toast the marshmallows but it’s essential that you watch like a hawk, because it only takes a couple of seconds for the marshmallows to transform from puffy, golden loveliness into a blackened, smoking mass.

If you make them ahead, cover and chill them in the fridge but bring to room temperature before adding the marshmallows for toasting.

S’Mores are best eaten right away.

S'Mores Parfait

S’Mores Parfait

 S’MORES PARFAIT

(Serves approx 8 -10)

Ingredients for the base:

1 & 1/2 cups (360ml measure) of graham cracker or digestive biscuit crumbs

1/4 cup (60ml measure) of sugar

1/3 cup (80ml measure) of melted butter

For the chocolate ganache layer:

½ pt (284ml) of whipping/single cream

8 oz (227g) of semisweet or bittersweet chocolate, chopped

Optional – 1 tablespoon of chocolate liqueur or dark rum (or whatever alcohol you have to hand that goes with chocolate)

To finish:

A small bag of mini marshmallows

Action:

Preheat the oven to 375F / 190C.

Mix the crumbs, sugar and melted butter thoroughly and spread them on a baking tray in a thin layer. Toast in the oven for 8-10 minutes until golden. Cool, then sprinkle half into the base of 8 (or more) small ramekins or glass dessert dishes.

To make the ganache, combine the cream (liqueur if using) and chocolate in a bowl over a pan of barely simmering water – stir until the chocolate melts (make sure the bottom of the bowl doesn’t come into contact with the water).

Once melted, place the bowl on a bed of ice in a larger bowl  – this cools it quickly while you whisk the mixture into a foamy bulk.

Divide the mousse-like chocolate ganache between the individual dishes and sprinkle some of the remaining cookie crumbs on top. If you make them up to this point, just cover and chill but bring them back to room temperature at least one hour before serving.

To serve – heat up your grill/broiler. Top each dish with mini marshmallows – enough to cover completely in a single layer.

Arrange them on a baking tray about 6-8 inches (15-20mm) from the heat source and watch as the marshmallows puff up and turn golden; this usually takes less than a minute. Turn them around a bit to make sure they toast evenly and serve right away, or at least within 10 minutes.


Posted in Desserts | 5 Comments

Recipe – Spicy Thai Satay Dipping Sauce

You can buy basic Asian ingredients in most supermarkets these days and if you enjoy Thai food, you’ll love this classic satay sauce  – and it only takes a couple of minutes to make.

Use it as a dip for raw veg as I did here, or serve it with grilled skewered tofu, shrimp, chicken, beef or pork – it’s authentic tasting and absolutely delicious.

Whether you’re grilling indoors or out, add this to your repertoire of sauces and make it a few hours ahead to allow the flavors to develop. It keeps for several days covered in the fridge but bring it to room temperature before serving.

The below measurement can be adjusted to suit your taste-buds, so you may want to tweak it at the end until you think it’s perfect.

Note: it’s made with Thai fish sauce and peanuts, so is unsuitable for vegetarians and folks with a peanut allergy.

 Thai Satay Sauce

Thai Satay Sauce

THAI SATAY DIPPING SAUCE

(Makes approx 1 & 1/2 cups / 360ml)

Ingredients:

1 tablespoon of coconut or vegetable oil (not olive)

1/2 – 1 teaspoon of Thai red curry paste, depending on how much heat you like

1/2 teaspoon of ground turmeric

1/2 cup ( 120 ml measure) of smooth peanut butter

1 cup (240 ml measure) of coconut milk  – or half coconut milk, half water

2 teaspoons of Thai fish sauce, aka ‘nam-pla’

1 teaspoon of freshly squeezed lemon juice

A little sugar or your preferred sweetener, to taste

Action:

Heat the oil in a non-stick pan over a moderate heat then add the turmeric and red curry paste – stir around for a minute or so until blended and sizzling.

Add the remaining ingredients, turn the heat down to low and whisk gently for a couple of minutes until  the sauce begins to bubble.

Remove it from the heat, continue to stir for another minute or so then adjust the ingredients if you need to, until you have a perfect spicy-salty-sweet combination of flavors with the desired consistency.

Transfer the sauce to a bowl, cover with cling film and chill for at least 2 hours or overnight. Bring it to room temp before serving.


Posted in Fish & Seafood, Indian & Asian Cuisine, Made in Under 30 mins, Sauces, Preserves, Condiments | 3 Comments

Recipe – Pesto Baked Fish with Sweet Potato Mash

Busy foodies will love this delicious supper dish; you’ll have it on the table in under 20 minutes and it works with any firm fleshed white fish such as cod, haddock, halibut, pollack, etc.

I like to make my own pesto and freeze it in small ice cube trays but any good quality store-bought pesto works beautifully – a great shortcut. You don’t have to skin the tomatoes either; I just prefer them that way but not skinning them will shave another 2 minutes off the prep time, if you don’t care either way.

This also works brilliantly with defrosted fish fillets so there’s no need to panic if you can’t find decent fresh fish on a Monday, for instance – and as far as I’m concerned there’s absolutely nothing wrong with using frozen fish or veg.

Pesto Baked Fish with Sweet Potato Mash

Pesto Baked Fish with Sweet Potato Mash

PESTO BAKED FISH WITH SWEET POTATO MASH

(Serves 4)

Ingredients:

20-24oz (570-680g) of boneless, skinless white fish cut into 4 equal portions

4 tablespoons of good quality pesto

2 large ripe tomatoes, skinned, de-seeded and chopped

24oz (700g) of sweet potatoes, peeled and cut into smallish chunks

7-8oz (200g) of frozen peas

The finely shredded zest & juice of half a lemon

Freshly ground black pepper

Action:

Preheat the oven to 390F (200C).

Oil a small baking dish and arrange the fish in a single layer.

To skin the tomatoes, cut a small ‘X’ in the skin at the bottom and pour boiling water over them to cover. Drain after 30 seconds and slip the skins off.  Otherwise, just cut them in half, scoop out the seeds and chop into about ½ inch (1cm) dice.

Mix the chopped tomato into the pesto sauce and spoon the mixture onto the top of each fish fillet.

Bake the fish in the preheated oven for approx. 15 minutes or until just cooked through.

Meanwhile, cook the sweet potatoes in a pan of lightly salted boiling water for 12 minutes then add the frozen peas. Cook for another couple of minutes until the potatoes are tender; drain and return the veg to the pan then mash with a good sized knob of butter, adding the lemon zest, juice  – and finally, a good grind of freshly milled black pepper.

Divide the sweet potato & pea mash between 4 warmed plates and top each with a baked fish fillet.

Posted in Fish & Seafood, Made in Under 30 mins | 4 Comments

Recipe – Minted Green Pea Hotcakes with Smoked Salmon

These pretty green hotcakes are light and fluffy – and they only take a few minutes to make from start to finish.

You could also serve them as an hors d’oeurve; just divide the batter into 12 little pancakes. Here, it’s divided into 4 to make a light appetizer or brunch dish.

Instead of smoked salmon, try adding chopped cilantro (coriander leaf), a pinch of ground cumin and/or cayenne to the batter and offer some  Indian yogurt, mint, ginger, chili & cilantro relish on the side.

The variations are endless; sour cream and caviar would also be good on a tiny pancake.

For some reason, *self-raising flour is hard to come by in the US so I create my own as follows:

  • 1 cup (240ml measure) of plain/all-purpose flour (you don’t want to pack it down, so spoon the flour into the cup measure then level the top off with the blade of a knife)
  • 1.5 level tablespoons of baking powder (a tablespoon is a 15ml measure)
  • a pinch of salt

Whisk everything together and store just as you would regular flour.

Minted Green Pea Hotcakes with Smoked Salmon

Minted Green Pea Hotcakes with Smoked Salmon

MINTED GREEN PEA HOTCAKES WITH SMOKED SALMON

(Served 4 as an appetizer)

Ingredients:

4 oz (115g) of tiny frozen peas, defrosted and drained

2 scallions/spring onions, trimmed and finely sliced

6 sprigs of mint – stalks discarded, the leaves chopped

2.5 oz (70g) of *self-raising flour

1/4 teaspoon (1ml measure) of baking powder

1 large egg

4 tablespoons of buttermilk, whole milk or thin cream

1 tablespoon of high-temp oil for frying (avocado or grape-seed oils are perfect for this)

Sea salt, freshly ground black pepper

To serve:

6 oz (170g) of smoked salmon, divided

4 heaped tablespoons of sour cream

Action:

Lightly whisk the buttermilk and egg together and set aside.  In a separate bowl, mash the peas with a spud-masher; add the chopped onion and mint; season with sea salt and black pepper and stir to mix.

Add the flour and baking powder, followed by the egg-buttermilk mixture and fold everything together until you have a thick, sticky batter.

In a wide non-stick skillet or saute pan, heat the oil over a high heat. Divide the batter into 4 even-sized pancakes and cook them over a fairly high heat until golden – approx 2 minutes each side.

Transfer the hotcakes to warmed plates; top each with a dollop of sour cream and some smoked salmon. Eat right away.

Posted in Fish & Seafood, Made in Under 30 mins, Vegetables / Vegetarian | 4 Comments

Recipe – Fresh Oranges in a Cranberry Caramel with Candied Cranberries

This refreshing dessert would be perfect for Valentine’s day. The cranberry caramel syrup has a lovely deep garnet color and quite an intense burnt-sugar-cranberry flavor that goes beautifully with fresh oranges – and you don’t need to use very much.

Any left over caramel will keep for weeks in a glass screw-top jar in the fridge and is gorgeous drizzled over cheesecake, ice cream, pancakes, etc.

Make just enough candied cranberries for the dessert because they won’t keep as long, or you could make more and eat them on their own.

Oranges in a Cranberry Caramel Sauce with Candied Cranberries

Oranges in a Cranberry Caramel Sauce with Candied Cranberries

ORANGES IN A CRANBERRY CARAMEL WITH CANDIED CRANBERRIES

(Serves 4)

Ingredients:

4 organic navel oranges

For the cranberry caramel syrup –

  • 1 cup (240ml measure) of fresh or defrosted frozen cranberries
  • ½ cup (120ml) of water
  • 1 ½ cups (360ml measure) of fine white sugar

For the candied cranberries (optional) –

  • 1 cup (240ml measure) of fresh or frozen cranberries
  • 3/4 cup (180ml measure) of sugar
  • Finely grated zest of an orange
  • 1/4 cup (60ml) of water

Action:

Start by making the cranberry caramel syrup up to 3 weeks ahead:

In a heavy pan, heat the sugar over a moderate heat until it becomes a liquid golden caramel. Once it starts to liquefy, use a fork to stir it about; it should become very runny; this can take 30 mins or more, so be patient.

Meanwhile, in a food processor, pulse the cranberries with the water until they’re finely minced – set aside.

Once the sugar has reached the runny golden stage with no granules remaining, remove it from the heat and quickly add the chopped cranberries and water. It will make a big fuss, steam a lot and solidify.

Return it to the heat and allow it to simmer, stirring until everything has dissolved once more – about 10 mins.

Push through a fine mesh sieve/strainer into a bowl, pressing down on the solids until you’ve extracted all the liquid. Discard the solids and when it’s cooled a bit, pour the syrup into a clean, glass screw-top jar and refrigerate – it will keep for many weeks.

Next, make the candied cranberries (optional) –

Action:

Heat 1/4 cup of water with 1/4 cup sugar and simmer for a few minutes to dissolve the sugar. Remove it from heat and add the cranberries – stir gently and set them aside to cool in the liquid.

Put a fine-mesh rack onto a cookie sheet and transfer the cranberries with a slotted spoon to the rack in a single layer. Leave them to drip-dry at room temp for 60-90 minutes and discard any remaining syrup in the pan.

Blitz the orange zest with the remaining sugar until finely blended and transfer to a wide bowl.

Drop the sticky berries one large spoonful at a time, into the bowl of orange sugar and toss around to separate them and coat with sugar. Finally, transfer them to a parchment-lined cookie sheet to dry out again for a minimum of 1 hr (any leftover sugar can also be discarded). They’ll keep a few days in the fridge in a sealed container.

Prepare the oranges – carefully cut away the skin and white membranes from the fruit and slice about 1/4 inch (1/2 cm) thick on a cutting board with a grooved edge, to capture any juice. Arrange the slices with the juice in a shallow serving dish.

Drizzle the oranges with a couple of tablespoons or more of cranberry caramel and chill in the fridge for an hour or two then decorate with the candied cranberries (if using), just before serving.

Some good vanilla ice cream on the side would be lovely although I prefer these just as they are.


Posted in Desserts, Gluten Free Desserts | 2 Comments

Recipe – Butternut Squash & Smoked Fish Chowder

This hearty chowder is packed with nutrients, tastes delicious and is really easy to make.

Use whatever cooked smoked fish you prefer – I used hickory smoked salmon but smoked whitefish or trout would also be good.

You can buy cartons of organic fish stock from Whole Foods and other good supermarkets. It also freezes well but I recommend adding the smoked fish after you’ve defrosted it, then heating it through gently.

Butternut Squash Chowder with Smoked Fish, White Beans & Corn

Butternut Squash Chowder with Smoked Fish, White Beans & Corn

BUTTERNUT CHOWDER WITH SMOKED FISH

(Serves 4-6)

Ingredients:

Approx 1.5 lbs (750g) butternut squash

2 tablespoons of olive oil

2 leeks, cleaned and thinly sliced

2 celery stalks, finely chopped

14 oz (400g) can of cannellini or great northern beans, drained and rinsed

1 pint (500ml) of really good fish or seafood stock

7 oz (195g) can of unsweetened sweetcorn in water, drained

The finely grated zest and juice of half a lemon

10-11 oz (300g) of smoked fish, skinned and flaked into small pieces

Sea salt & freshly ground black pepper

A couple of tablespoons of chopped flat leaf parsley

Action:

Preheat the oven to 350F (180C). Cut the butternut squash in half and scoop out the seeds. Brush the cut flesh with olive oil and season with sea salt and freshly ground black pepper. Lay the squash cut sides down in a roasting pan and bake for about 45 minutes or until they’re soft when squeezed – remove them from the oven and once cooled, scoop out the soft flesh with a spoon and set aside (you can do this ahead – just cover and chill until you’re ready to assemble the chowder.)

Heat 1 tablespoon of oil in a large pan and gently cook the leeks and celery until they’re soft.  Add the beans, fish stock, half of the sweetcorn, the lemon juice and zest and a pint (500ml) of water. Bring to a simmer then add the cooked butternut squash and stir well to combine and turn off the heat. Once it’s cool enough, puree the lot in a blender or  use one of those hand blender things.

Return the chowder to the pan and add the smoked fish and remaining sweetcorn. Heat it through gently, check the seasoning, transfer to warmed soup bowls and scatter with chopped parsley to serve.


Posted in Fish & Seafood, Soups | 2 Comments

Recipe – Porcini & Parmesan Baked Spinach

This dish is adapted from a Ruth Rogers-River Cafe recipe. River Cafe is one of my long-time favorite London restaurants located in Fulham right on the Thames and is a particularly nice setting for lunch or for eating outside on a summer’s evening.

Being an ardent porcini lover – you can read about that here – I’m always looking for ways to incorporate them into other vegetable dishes. This is absolutely delicious and rather luxurious, with the almost meaty earthiness of the porcini combining beautifully with baby spinach in a soft, cheesy, quiche-like custard.

In fact it’s so good, it would make a wonderful vegetarian entree. For meat eaters, it would be perfect served with roast lamb.

If you don’t forage for your own, dried porcini are available in small packets from most good supermarkets. A little goes a long way, which is a good thing as they’re rather expensive. Any you don’t use will keep for ages in an airtight glass container.

Spinach baked with Porcini & Parmesan

Spinach baked with Porcini & Parmesan

SPINACH BAKED WITH PORCINI & PARMESAN

(Serves 6 as a side dish)

Ingredients:

Two 5 oz (141g) containers of ready-washed,organic baby spinach

3/4 – 1 oz (20-28g) of dried porcini mushrooms, just covered with very hot water and soaked for 20 minutes

3 tablespoons of olive oil

1 clove of garlic, finely minced

2 large eggs

7 fl oz (200ml) of heavy cream

1 and 1/2 oz (30g) of freshly grated Parmiginao Reggiano – plus an extra couple of tablespoons to sprinkle on top

Action:

Preheat the oven to 400F (200C) and butter a 2 inch (5 cm) deep ovenproof gratin dish.

Strain the soaked mushrooms through a paper towel squeezing them out well to capture all of the soaking liquid, as you’ll be using it. Briefly rinse the soaked porcini  under warm running water to remove any residual woodland debris and chop them finely – set aside.

Heat a little olive oil in a wide saute pan and wilt the spinach, stirring for a few minutes then transfer the spinach to a bowl. Add a little more oil and soften the garlic for a few minutes then add the chopped porcini. Saute, stirring for a couple more minutes, then tip in the strained porcini soaking liquid and bring the heat up  until most of it bubbles away – about 5 minutes.

Meanwhile, beat together the eggs, cream and grated Parmesan. Add freshly ground black pepper and  sea salt to taste, followed by the wilted spinach and finally the porcini-garlic mixture. Stir thoroughly to combine and transfer to the buttered dish.

Sprinkle one or two tablespoons of grated Parmesan on top then bake for 25-30 minutes or until it’s puffy and golden.

Serve right away.


Posted in Vegetables / Vegetarian | 5 Comments

Recipe – Butternut Squash Risotto with Crispy Sage

Risotto is such a wonderful comfort food and can be fun to prepare in front of dinner guests – they’ll keep you company by chattering away in the kitchen over a glass of prosecco while you’re stirring for about 20 minutes, wine in hand.

Because risotto should be served immediately, have the bowls warming in the oven and everything else prepared and ready to go.

Vegetarians can substitute the chicken broth with vegetable and you’ll probably want some extra freshly grated Parmesan to pass around.

Butternut Squash Risotto with Sage

Butternut Squash Risotto with Sage

BUTTERNUT SQUASH RISOTTO with CRISPY SAGE

(Serves 4)

Ingredients:

1 ½ lbs (600g) of butternut squash or pumpkin, peeled and cut into very small pieces

2 tablespoons of olive oil

3 ¼ oz (90g) butter, plus an extra ounce (30g)

6 sage leaves –  keep 4 for frying

1 garlic clove, slightly crushed

1 large shallot, finely chopped

10 ½ oz (300g) of Arborio rice (unwashed)

1 ¾ pints (1 liter) of chicken or vegetable stock

1 ¾ oz (50g) of finely grated Parmigiano Reggiano, plus extra to serve

Sea salt and freshly ground black pepper

Action:

In a pan, heat the oil and about a third of the butter, then add 2 sage leaves, the garlic clove and butternut squash. Cook,  stirring occasionally for about 20 minutes or until the pumpkin softens and falls apart. Discard the garlic and sage leaves and set it aside. You can do up to here ahead of time.

Bring the chicken or vegetable broth to a very low simmer in a separate pan and keep it hot over the lowest heat possible.

In a separate large saute pan, heat half of the remaining butter and saute the shallot over a low heat until it’s translucent and soft, then add the rice and give a good stir and continue to stir for a couple of minutes until the rice is well coated with butter. Season with freshly ground black pepper and sea salt to taste.

Add about half a cup of hot stock to the rice, stir well then add the butternut squash.

Add more hot stock a little at a time, until it’s all used up and has been absorbed by the rice (keep some extra stock available on the side and ready to heat up in case you need to add more than this) – stir every minute or so between additions.

Meanwhile,  fry the sage: heat the extra 1 oz (30g) of butter in a small pan until it’s foaming then drop in the sage leaves. Fry them for about 20 seconds until they’re crisp then transfer then to a paper towel to drain.

Once the rice is ‘al dente’ and all the stock has been absorbed, adjust the seasoning, turn off the heat and quickly stir in the remaining butter and the grated Parmesan.

Serve the risotto in warmed individual bowls, each topped with a sage leaf.

Posted in Made in Under 30 mins, Pasta, Vegetables / Vegetarian | 2 Comments

Recipe – Panforte di Siena

Panforte di Siena comes in a variety of shapes and sizes and the original recipe can be traced back to the early 13th century (probably in Siena, Italy), which explains the numerous subtle variations.

One of the many things that every version of Panforte di Siena has in common however, is that it’s bloody expensive to buy. Yes, the ingredients are quite costly but you don’t use very much of anything and just a thin slice of this spicily aromatic cake is all you’ll need, perhaps with a little espresso or dessert wine at the end of a meal.

Panforte is also surprisingly easy to make which is why I’m sharing it here. It can be made with any variety of unsalted nuts and candied fruits and I used the ones I had available. The amount of black pepper may seem a little odd initially but pepper (along with some minced crystallized ginger) creates a lovely, lingering warmth.

The key is to let the cake rest for 2-3 days before serving it, as the spices may seem a little overwhelming at first but they mellow into a wonderful ‘oneness’ that is quite irresistible.

If you love dried fruit, nuts and spices, then you’ll be delighted with this  – and as it’s a rather showy-offy kind of cake, you’ll also delight whoever you choose to share it with.

Note – I buy edible rice paper online from Amazon.com. You’ll also need a shallow 10 inch (25cm) round, or an 8 inch (20cm) square cake pan.

Panforte di Siena

Panforte di Siena

PANFORTE DI SIENA

(Serves 10)

8.5 oz  (240g) of dried figs, stalks snipped off (use pitted dates if you don’t like figs)

1.75 oz (50g ) of clear honey

3.5 oz (100g ) of soft brown sugar

1/2  a teaspoon of each of the following –

  • ground cinnamon
  • ground cardamom
  • ground cloves
  • freshly-ground nutmeg
  • freshly-ground black pepper

8.8 oz (250g) of candied fruit, such as crystallized ginger, citron, orange or lemon peel – or any combination thereof

1.75 oz (50g) of whole blanched almonds (or walnuts, Brazil nuts, unsalted pistachios, etc)

1.75 oz (50g) of pine nuts

1.75 oz (50g) of toasted hazelnuts with most of the skins rubbed off

3-4 tablespoons of plain flour, sifted (use gluten-free if you prefer)

1.75 oz (50g) of dessert wine such as Muscat de Beaumes-de-Venise

Icing sugar to serve

Action:

Preheat the oven to 300F / 150C

Line the cake pan with rice paper (lining a square pan will be easier).

Put the dried figs in a food processor and pulse until finely minced, then transfer them to a pan with just enough water to cover the fruit. Add the honey, brown sugar and all of the spices.

Simmer gently for about 10-14 minutes until you have a soft, sticky mess that’s not at all runny.  Transfer to a bowl then fold in the candied fruit and nuts and mix everything thoroughly.

Fold in the flour followed by the dessert wine and mix well. Spoon the mixture into the prepared pan and smooth the top evenly.

Bake in the oven for 30-40 minutes then transfer it to a wire rack to cool completely in the pan.

Carefully lift it out of the pan onto a plate and allow it to sit for a couple of days at room temperature, covered, enabling the flavors to fully develop.

To serve, dust the cake with icing sugar and cut it into thin wedges.

Panforte will keep for several days in an airtight container at room temperature.

Posted in Desserts, Gluten Free Desserts | 3 Comments

Recipe – Penne Pasta with Vodka, Bacon & Chili

Pasta is so comforting and generally economical, assuming in this case that you have a bottle of vodka lurking around somewhere.

Full of flavor and and easy to prepare, you can use prosciutto, ham or cooked bacon (which happened to be all I had when I threw this together). If I’d planned a little better, I’d have gone with prosciutto but that’s up to you as it was still very good.

Penne with Vodka, Bacon & Chili

Penne with Vodka, Bacon & Chili

PENNE PASTA with VODKA, BACON & CHILI

(serves 4)

Ingredients:

2 oz (50g) of butter

3.5 – 4 oz (100g) of prosciutto, ham or cooked bacon – chopped

2 tablespoons of tomato puree/paste

1 heaped tablespoon of chopped Italian flat leaf parsley

5 tablespoons of crème fraîche

3 tablespoons of vodka

1/4 – 1/2 a teaspoon of dried chili flakes (increase or decrease to taste)

10-11oz (300g) of penne pasta or other short pasta shapes

Sea salt & freshly ground black pepper

Action:

In a saute pan, melt the butter gently and add the prosciutto, tomato puree, dried chili flakes and half of the parsley. Stir over a low heat, cooking for approx 8-10 minutes while you get the pasta started. Season with sea salt and freshly ground black pepper.

Now add the vodka and crème fraîche to the tomato/chili/parsley mixture and give it a good stir, simmering for another minute or so to evaporate the alcohol. Check for seasoning.

Drain the al-dente cooked pasta briefly then immediately add to the sauce in  the pan and toss to coat.

Transfer the pasta to warmed bowls and sprinkle with the remaining parsley. Offer some grated Parmigiano Reggiano to go around.

Love pasta? Try these other great pasta recipes.

Posted in Made in Under 30 mins, Meat, Pasta | 2 Comments