Recipe – Sweet Potato and Polenta Cakes with Rosemary

These delicious little sweet potato cakes go really well with roast lamb, pork, beef, chicken or turkey  – and reheated then next day, topped with a dollop of crème fraîche and some wood-smoked salmon, they were a huge hit at breakfast.

They’re also good enough to eat on their own.

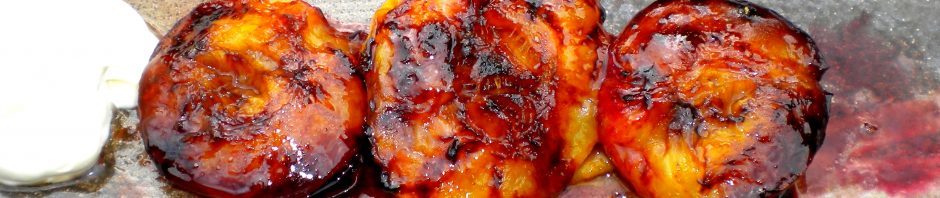
Slightly crunchy on the outside, tender on the inside, they only take a few minutes to make once you’ve baked the sweet potatoes in their skins.

Sweet Potato & Polenta Cakes with Rosemary

Sweet Potato & Polenta Cakes with Rosemary

SWEET POTATO POLENTA CAKES with ROSEMARY

(Makes approx sixteen 2-inch cakes)

Ingredients:

1.5 lbs (680g) of sweet potatoes

1/4 cup (60ml) of very hot water

1/4 cup (60ml) of runny honey, warmed

1/2 cup (120ml) of polenta / yellow cornmeal plus extra for dredging

1 teaspoon of chopped fresh rosemary

Pinch of sea salt

Hi temp cooking oil such as avocado, canola or grape seed

Action:

sweet potato cakes 004Bake the sweet potatoes in their skins in a pre-heated 335F (170C) oven for 1 hour. Allow them to cool a bit until you can handle them.

Meanwhile, in a large bowl, combine the polenta with the hot water, warmed honey, rosemary and sea salt – mix together well then squeeze the soft baked potato flesh out of their skins and add this to the mixture – stir to combine  and discard (or eat) the skins.

The mixture will be very soft so carefully form tablespoon-sized amounts into a ball then gently press them down onto a plate of polenta to coat both sides and flatten slightly into a patty shape.

Pour about 1/2 inch (1.5cm) of oil into a heavy, deep-sided saute pan and when hot (but not smoking), transfer no more than 4 patties at a time to the pan. Cook for about 3 minutes until the sides firm up, then flip them over and cook for another minute.

Transfer them to a paper-towel lined plate and continue in this way until they’re all done.

Best eaten hot or warm. You can reheat them gently in a warm oven, or on the stove-top in a dry heavy-based skillet.


Posted in Salads & Appetizers, Vegan, Vegetables / Vegetarian | 1 Comment

Recipe – Fresh Apricot Chutney with Indian Spices

Paonia is an area located on Colorado’s sunny western slopes that’s famous for it’s orchards and vineyards and I recently spent one scorching hot day there.

Everywhere you looked, there were apricot trees buckling under the weight of their golden fruit. Many weren’t quite ripe enough but while wandering through a sunny pasture, we came across a lone tree, completely exposed to the sun’s rays and loaded with apricots so ripe, that they dropped into your hand at the slightest touch.

These weren’t the large, fat apricots you see at the supermarket; they were small, warm from the sun and absolutely bursting with sweet juice. Possibly the best apricots I’ve ever tasted.

Back home and after greedily devouring several handfuls, I decided to make a chutney. Loosely adapted from a recipe in Mridula Baljekar’s Balti Cookbook, this isn’t the usual type of chutney that can be stored indefinitely as it doesn’t contain vinegar and it only takes a few minutes to cook. However, it does keep for several weeks stored in the fridge.

This relish is absolutely wonderful served with a sharp cheddar, grilled lamb, pork or any Indian dish.

Black onion seeds (kalonji) are available from Indian supermarkets or online from A1 SpiceWorld.

Fresh Apricot Chutney with Indian Spices

Fresh Apricot Chutney with Indian Spices

FRESH APRICOT CHUTNEY with INDIAN SPICES

(Makes 2 smallish jars)

Ingredients:

1 tablespoon of sunflower or corn oil

1/2 teaspoon of black onion seeds

1/2 teaspoon of whole cumin seeds

1.25 lbs (575g) of pitted apricots, roughly chopped

1 teaspoon of freshly grated ginger

1 fat clove of garlic, crushed

2 teaspoons of ground cumin

1 teaspoon of chili powder (decrease or increase to taste)

1 teaspoon of sea salt

1/2 teaspoon of sugar

1 oz (25g) of golden raisins

Action:

Fresh Paonia apricots 009Preheat a deep saute pan or wok then add the oil. When the oil is hot (but not smoking) add the onion seeds and cumin seeds – let them pop and sizzle for 30 seconds, then add the fruit, ginger, garlic, cumin and chili powder – stir fry for about 3 minutes.

Add the salt and sugar, stir fry for another 30 seconds then reduce the heat to low, cover the pan with a lid or piece of foil and continue to cook for another 5 minutes.

Remove the lid, add the raisins and stir-fry for 4-5 minutes or until the mixture has thickened. Take it off the heat, cool completely then transfer to clean glass jars and store in the fridge.

Paonia apricots


Posted in Indian & Asian Cuisine, Made in Under 30 mins, Vegan | 4 Comments

Recipe – Frozen Berries with a Warm White Chocolate Sauce

Loosely adapted from a Patricia Lousada recipe that I combined with a happy error of mine, this is drop dead easy to make and turned out to be quite an elegant dessert when served on a pretty plate.

Raspberries and blueberries freeze brilliantly and I always have some ready-frozen, in which case this dessert can be assembled in under 30 minutes. Otherwise, just spread the fresh berries in a single layer on a plate and freeze them overnight.

I’m not normally a fan of white chocolate, preferring the darkest of the dark – but I must say, this is really wonderful!

Frozen Berries with a Warm White Chocolate Sauce

Frozen Berries with a Warm White Chocolate Sauce

FROZEN BERRIES WITH A WARM WHITE CHOCOLATE SAUCE

(Serves 4)

Ingredients:

2 cups each (240ml measure) of frozen raspberries and blueberries

1 cup (240ml) of heavy (double) whipping cream

7 oz (200g) of good quality white chocolate chips such as Ghiradelli

1 teaspoon of pure vanilla or finely grated orange zest

Action:

To make the sauce, combine the chocolate chips, cream and vanilla (or zest)  in a bowl set over barely simmering water, making sure the bottom of the bowl doesn’t come into contact with the water. Check after a few minutes and give it a good stir every now and then until the chocolate has completely melted.  Remove from the heat and let it cool for a few minutes.

Divide the frozen berries between 4 dishes or dessert plates and pour the sauce over and around the berries to serve.


Posted in Desserts, Gluten Free Desserts | Leave a comment

Recipe – Oven Roasted Baby Turnips with a Lemon & Herb Vinaigrette

Turnips can grow to be be as big as your head, are rather unappetizing and they’re frequently fed to livestock.

However, if you’re lucky enough to find tiny baby turnips as I did at the farmers market the other day, then I recommend buying a bagful. When raw, they have a crisp, peppery flavor and are absolutely delicious sliced into a salad or dunked into aioli, as you would with a radish.

However, if you roast them in a hot oven for about 20 minutes, you’ll have sweeter-tasting, tender morsels, made even more delicious when smothered in a lemony herb dressing.

Another way to serve them would be to cook them like potatoes then toss them in butter with a little soft brown sugar.

In this recipe they’re best eaten warm or at room temperature. I left the green stalks on them for appearances only – they aren’t meant to be eaten.

Roast Baby Turnips with a Lemon Herb Vinaigrette

Roast Baby Turnips with a Lemon Herb Vinaigrette

ROAST BABY TURNIPS with a LEMON & FRESH HERB VINAIGRETTE

Ingredients:

1 lb (1/2 kilo) of baby turnips, washed and with stalks trimmed short

2 tablespoons hi temp cooking oil such as avocado or grape seed

For the vinaigrette:

1/2 tablespoon of freshly squeezed lemon juice

½ teaspoon of finely grated lemon zest

1 teaspoon of Dijon mustard

1 tablespoon of finely chopped shallot

2 heaped tablespoons of chopped parsley

A pinch or two of sugar

4 tablespoons extra-virgin olive oil

Roast Baby Turnips, Lemon & Herb Vinaigrette 003Action:

Combine all the vinaigrette ingredients together and set aside.

Preheat the oven to 425F / 220C and put a roasting pan in the oven to heat.

Cut the turnips in half lengthwise, toss them with the two tablespoons of avocado oil and season with sea salt and freshly ground black pepper.

Arrange the turnips in the preheated pan and roast for 18-25 minutes or until tender and tinged brown in patches.

Transfer them turnips to a bowl, allow them to cool a bit then toss them with the vinaigrette.

Serve warm or at room temp. If you make them ahead, cover and chill in the fridge but bring them back to room temp before serving.

Posted in Made in Under 30 mins, Salads & Appetizers, Vegan, Vegetables / Vegetarian | 4 Comments

Recipe – Watermelon Salsa

Fresh, fruity, versatile and totally summery, this fragrant salsa has quite a kick and goes brilliantly with grilled fish, chicken, sausages, burgers, pork, lamb, even beef kebabs – or just serve it with your favorite chips.

If you can’t find jicama, use English hothouse cucumber and that goes for seedless watermelon as well; I just happened to have one lurking in the fridge. Diced mango, roasted sweetcorn kernels or tomatoes are also wonderful – in fact many combinations of ingredients will make a perfect salsa; just make sure you always include the cilantro (coriander), onion, lime and chili.

Watermelon Salsa

Watermelon Salsa

WATERMELON SALSA

(makes about 3 cups)

Ingredients:

2 jalapeño chilies or one red chili, seeded and finely diced (add more for extra fire)

The juice of 1 or two limes

1 bunch of fresh cilantro (coriander), tough stems discarded, leaves chopped

1 each of small red, yellow and orange peppers, seeded and finely chopped

½ cup measure of finely diced jicama

1 medium shallot, finely minced

Half of a small seedless watermelon, cut into small dice

Sea salt to taste

Action:

Pretty simple; combine all the above and adjust the salt to taste. Cover and chill up to 4 hours.


Posted in Made in Under 30 mins, Salads & Appetizers, Vegan, Vegetables / Vegetarian | 5 Comments

Recipe – Pasta Salad with Anchovies, Parsley & Black Olives

Don’t dismiss this because of the word ‘anchovies’…this is one of the most delicious and simplest pasta salads, ever.

I’ve been making it for well over 20 years and as I’ve frequently mentioned when anchovies show up in a recipe, even anchovy haters have eaten it and proclaimed it to be wonderful.

It’s also very simple to make, especially if you use store-bought mayonnaise. All I would say is that if you don’t make your own mayo, buy the best quality possible, preferably made with olive oil.

This is one of those pasta salads that tastes even better the next day; just cover and chill in the fridge.

Pasta Salad with Anchovies & Black Olives

Pasta Salad with Anchovies, Parsley & Black Olives

PASTA SALAD with ANCHOVIES, PARSLEY & BLACK OLIVES

(Serves 4-6)

Ingredients:

12 oz (350g) of your favorite short pasta shapes

2 tablespoons of extra-v olive oil

5 heaped tablespoons of good mayonnaise

1 fat clove of garlic, crushed

A few tablespoons of chopped Italian flat-leaf parsley

1/2 cup (120ml measure) of pitted Nicoise or Kalamata olives

A small can of anchovy fillets (1.75 oz / 47g), partly drained of oil

Freshly ground black pepper

Two or 3 hard boiled eggs

Action:

Start by cooking the pasta according to instructions until it’s ‘al dente’ then drain, rinse under cold running water and drain again. While the pasta is cooking, hard-boil the eggs and drop them into cold water to cool.

Meanwhile, mash together the anchovies with the garlic and mayonnaise until they’re thoroughly combined.

Stir 2 tablespoons of olive oil into the pasta until every piece is well coated, followed by the chopped parsley, black olives, the anchovy mayonnaise and a good grind of black pepper.

Give it all a good stir, cover with cling film and let it rest at room temp for about 30 minutes before decorating with sliced hard boiled eggs to serve – or cover and chill in the fridge for an hour and up to 24 hrs.


Posted in Fish & Seafood, Made in Under 30 mins, Pasta, Salads & Appetizers | 3 Comments

Recipe – Vietnamese Rolls with Shrimp

These are a lot of fun to make but I wouldn’t let children participate, as a big bowl of scalding hot water is required.

Not really a recipe; you can add whatever you like and below are just some suggestions. At one point, I’d even thought about making a sort of Mexican ceviche version but I always come back to the tried and trusted Vietnamese type of roll.

The benefit of having your guests make their own is that it saves you all the work, not that it’s really work but unless you’re an experienced roller, they won’t start looking neat until you’ve practiced and made a few. They’ll taste great nonetheless and making your own will serve as a great icebreaker, assuming there’s any ice to break.

Here’s a ‘how to wrap rice paper rolls’ – guide for you.

Vietnamese rice paper is inexpensive and can be bought from Amazon or any good Asian supermarket.

Yes, the little chive ties I used here are a bit pretentious and completely unnecessary – there was just so much growing in the garden that I couldn’t resist it, just this once.

Vietnamese rolls with shrimp 006VIETNAMESE SPRING ROLLS WITH SHRIMP

(Make as many as you want)

Ingredient suggestions:

Vietnamese rice paper rounds

Rice vermicelli noodles cooked and chilled

Cooked shrimp (split in half lengthwise), tofu or chicken

Shredded basil, mint and cilantro (coriander) leaves

Carrot, hothouse cucumber, daikon radish and/or jicama, cut into fine matchsticks

Lettuce leaves, shredded

Beanshoots

Minced red chili (for the brave)

To serve – your favorite Asian dipping sauce (I made my favorite spicy peanut satay sauce)

Action:

To have your guests make their own, put the large bowl of very hot water in the center of the table, surrounded by the assorted ingredients in small dishes. Here’s where one of those ‘lazy Susan’ things would come in handy. Study the instructions in the link above before they arrive so that you’ll look like an expert. Offer an assortment of sauces to dip into.

The eating process with involve a bit of fumbling and be slower than usual but you’ll have a ton of laughs, especially with the first few attempts.

Posted in Fish & Seafood, Indian & Asian Cuisine, Made in Under 30 mins, Salads & Appetizers | 4 Comments

Recipe – Asparagus Tarts with Parmesan & Lemon

With tender young asparagus at it’s best right now, you can make these lovely, crisp little tarts in no time at all using frozen puff pastry.

Frozen puff pastry is one of the best shortcuts and works really well with sweet or savory fillings. I keep some in my freezer, while lemons, Parmigiano Reggiano and pots of crème fraîche are always lurking in my fridge.

Adapted from a Nigel Slater recipe that I found in his ‘Kitchen Diaries II’, these asparagus tarts make a perfect appetizer or light lunch, served with a mixed leaf salad.

*It’s worth investing in good Italian Parmigiano Reggiano cheese and grating it as needed. The flavor is far superior to the domestic varieties which means you use less, making it more economical than you think. Keep it in the fridge wrapped ideally in a piece of muslin in the cheese drawer and it will last for ages. Save and freeze the rinds – they’re a wonderful addition to soups.

Asparagus Tart with Parmesan & Lemon

Asparagus Tarts with Parmesan & Lemon

ASPARAGUS TARTS with PARMESAN & LEMON

(makes 3 or more individual tarts)

Ingredients:

One sheet (approx 8 oz / 245g) of defrosted puff pastry, unfolded and cut into three along the folds

The finely grated zest of half a large lemon

Approx 15 asparagus spears, depending on their size (these were young and skinny so the tarts here had 5 each)

3.5 oz (100ml) of crème fraîche or heavy cream

2 oz (57g) of finely grated Parmesan

A spoonful of snipped fresh chives

Action:

Pre-heat the oven to 375F (190C).

You may or may not want to roll out the pastry sheet on a lightly floured board (I didn’t but if you do, you can make up to 6 smaller tarts)

Trim and steam the asparagus until al-dente – set aside.

Arrange the pastry rectangles on a baking tray and with a sharp knife, being careful not to cut right through the pastry, score around the edges about 1/2 inch (1.5 cm) in, to create a raised rim.

In a small saucepan, warm the crème fraîche with the lemon zest and cheese until the cheese has mostly melted, then spoon half of the mixture into the center of each pastry rectangle. Arrange the asparagus spears on top then spoon the remaining cream mixture over the asparagus, reserving some for later if it looks like it’s going to overflow the pastry edges.

Bake in the pre-heated oven until the filling starts to turn brown in patches and the pastry is puffed and golden. (about 15-25 minutes depending on your oven). Note – if the center of the tarts puff up too much while baking, give them a decent stabbing with a fork to deflate – and if you have any leftover cream & cheese mixture, drizzle it over the asparagus at this point, as the pastry edges will have risen to hold it in place.

Scatter them with a few chopped chives and serve the tarts while they’re hot or still warm from the oven.


Posted in Made in Under 30 mins, Salads & Appetizers, Vegetables / Vegetarian | 2 Comments

Recipe – Tagliatelle with Smoked Salmon, Lemon & Crème Fraîche

Impressive enough for a dinner party, this pasta dish is luxurious, fragrant and takes no time at all to assemble.

Crème fraîche keeps very well and I always have some handy, along with fresh lemons and an assortment of dried pasta. All that was needed was a small amount of wild-caught smoked salmon and this was on the table in 12 minutes…fast and utterly fabulous, the lemony cream sauce lightly coats the pasta and the end result is rich-tasting without being at all heavy.

*Crème fraîche is available from good food emporiums. Don’t be tempted to substitute with sour cream – it tastes completely different. If you can’t find crème fraîche, use regular heavy cream.

**Parmesan isn’t traditionally served with fish or seafood pasta.

Tagliatelle with Smoked Salmon

Tagliatelle with Smoked Salmon


TAGLIATELLE WITH SMOKED SALMON, LEMON & CREME FRAICHE

(Serves 4)

Ingredients:

4 tablespoons of unsalted butter

3.5 – 4 oz (100g) of smoked salmon, preferably wild-caught

The finely shredded zest and juice of half a large lemon

Freshly ground black pepper

3.5 fl oz (100ml) of crème fraîche

11 oz (300g) of tagliatelle verdi (spinach) or regular tagliatelle made with eggs

Action:

Heat the water for the pasta. Tagliatelle usually only takes about 3-5 minutes to cook.

Chop the smoked salmon into smallish pieces. Melt the butter in a small pan and add the salmon along with the lemon juice and a good grind of black pepper. Stir well, heat through gently then add the crème fraîche.

With the heat turned low, cook for about 4-5 minutes while the pasta is cooking. As soon as the pasta is al dente, drain it quickly and add it to the pan with the salmon and continue to cook for 30-60 seconds more, tossing well to combine.

Transfer to a warmed serving bowl, scatter the lemon zest all over and serve immediately.


Posted in Fish & Seafood, Made in Under 30 mins, Pasta | 1 Comment

Recipe – Puy Lentil Bolognaise

Slightly adapted from the marvelous Nigel Slater’s lentil bolognaise recipe in his book ‘EAT’, this twist on the classic ‘Spag-Bol’ is surprisingly good. Nigel refers to it as “Earthy, frugal and filling”.

He forgot to add ‘delicious’. I took the liberty of adding a can of organic chopped Italian tomatoes and some dried porcini from a previous year’s foraging; soaked in a little hot water until softened,  then chopped and added along with the soaking liquid.

A simple, quick supper that will feed four people happily.

*Puy lentils are the little dark French variety, available from upmarket food emporiums and dried porcini mushrooms are widely available these days.

Puy Lentil Bolognaise

Puy Lentil Bolognaise

PUY LENTIL BOLOGNAISE

(Serves 4)

Ingredients:

2 medium sized carrots, scrubbed and diced small

1 medium onion, finely minced

3 tablespoons of olive oil

7.5oz (200g) of Puy lentils

2 pints (1 liter) of good vegetable stock

A small can of chopped tomatoes and their juice

1/2 cup (120ml measure) of dried porcini mushrooms

2 heaped tablespoons of crème fraîche

1 tablespoon of balsamic vinegar

Sea salt & freshly ground black pepper to taste

11-12oz (300g) of pappardelle or egg fettucine

A handful of chopped flat leaf parsley

Action:

Cover the porcini with very hot water and allow them to soak for 20 minutes. Strain the liquid through a paper towel to remove any residual woodland debris, then rinse the mushrooms and diced them finely. Add them back to the filtered soaking liquid.

Heat the olive oil in a deep pan and saute the carrots for about 5 minutes then add the onion and continue to cook until the carrots are tinged brown and the onion has softened and turned golden.

Check over the lentils to remove any small stones lurking among them (you don’t want to end up at the dentist and this meal could become considerably less frugal if you ignore my advice) – rinse them if necessary.

Add the lentils to the carrot and onion followed by the vegetable stock, canned tomatoes and juice, mushrooms and their soaking liquid. Bring to a rapid boil then lower the heat to a simmer and cook until the lentils are soft (anywhere from 25-45 minutes). Season with sea salt and black pepper towards the end of the cooking time.

Cook the pasta according to instructions until al-dente.

While the pasta is cooking, remove half of the lentil mixture and blitz it in a food processor until you have a coarse purée, then add to the remaining lentils in the pan, along with the crème fraîche and balsamic vinegar. Give everything a good stir, check the seasoning and serve over the hot noodles along with a good scattering of chopped parsley.


Posted in Vegetables / Vegetarian | 2 Comments